I’ve started an index post here at the blog to keep up with the Connected Learning with Cats presentations I’m developing for CanvasLIVE. The slidedeck posts are linked below with the slides, copious notes — and I’ve got a YouTube Playlist with all 7 videos now! 🙂
Completed events:
Twitter4Canvas: slidedeck-notes-video This event took place on Thursday, March 23 at 3PM EST.
Blog-as-Homepage: slidedeck-notes-video
This event took place on Thursday, April 6 at 3PM EST.
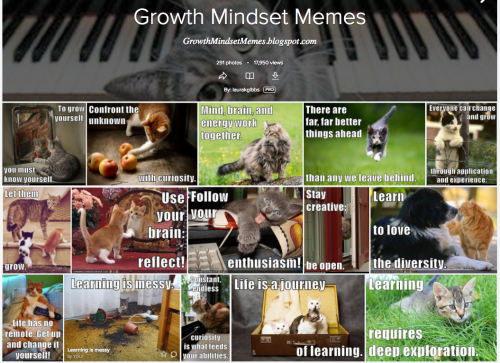
Growth Mindset: slidedeck-notes-video
This event took place on Thursday, April 20 at 3PM EST.
Javascripts in Canvas:slidedeck-notes-video
This event took place on Thursday, May 4 at 3PM EST.
YouTube Playlists:slidedeck-notes-video
This event took place on Thursday, June 1 at 3PM EST.
Using Free Online Books:slidedeck-notes-video
This event took place on Thursday, June 15 at 3PM EST.
Pinterest and Flickr:slidedeck-notes-video
This event took place on Thursday, June 29 at 3PM EST.
My final CanvasLIVE of the summer featured … Flickr!
Slide 4. Taming the Web: The Power of Curation. This is my third curation presentation so far this summer; you can find the other two here: YouTube Playlists and Online Book Libraries.
Slide 5. Dimensions of Curation. My focus for today is just on the sharing dimension of curation; I’ll be showing how you can share the “same” content in very different ways with very different tools, all of which work nicely in Canvas. And remember, you can have strategies for sharing all kinds of content: content you create, content that your students create, content that you find online. Online content wants to be shared!
Slide 6. Different Tools, Different Purposes. I’ve created a site where you can see the four tools — Pinterest, Flickr, Diigo, and Padlet — side by side: StoryLab.LauraGibbs.net.
For each tool, you are looking at a new summer project for my Indian Epics class where I am building a collection of “Stories from India” to use in conjunction with the epics. This is a brand-new project for the summer that I just started a couple of weeks ago, and all the content is housed in a blog: Fables of India. But as I said before, the focus here is not who created the content, you or someone else. Instead, the focus on how to share any kind of web content that you find valuable: content you create and/or content created by others.
Slide 7. Quick Overview of the Four Tools. I’m going to run through the four tools very quickly, and I hope you will go to the StoryLab site to see each one in action. Slide 8. Flickr. This page has a Flickr album slideshow with the stories from India. You can use the left-right arrows to move through the slideshow, and then either use the link in the caption to visit the story page (right-mouse click to open in a new tab!), or you can click on the image to go the Flickr page, and from there access the story page via the link provided. Slide 9. Pinterest. This page has a Pinterest Board with the stories from India. Click on an image to access the pin page, and you can then go from the pin page to the story page (more about the features of pin pages below). Slide 10. Diigo (RSS). This page has a live Diigo feed (via Inoreader) with the stories from India. The titles in the feed here will take you directly to the story page. The image thumbnails are automatically generated by Diigo, so this is not really an example of image curation — but one of the best things about Diigo is the way that you can add a thumbnail image to any bookmark! Slide 11. Padlet. This page has a Padlet with the stories from India. I’ve set this Padlet up so that I am the only author, but it’s easy to create a Padlet where your students can contribute also; more on that below.
Slide 12. Embedding the Tools in Canvas. In terms of being quick and easy, Padlet is the fastest (just use the Redirect Tool), and next would be Diigo (subscribe in Inoreader and then use Redirect Tool), with Flickr and Pinterest being more complicated because you have to upload the javascript as a File in Canvas, and then use an iframe to display that File in a Page. It’s not hard to do that, but it’s a multistep process that will probably take about 10 minutes. Slide 13. Flickr: Javascript-in-File-to-Page. Configuring the album slideshow is very easy, and I’ve written up detailed instructions for embedding the slideshow script in Canvas. Slide 14. Pinterest: Javascript-in-File-to-Page. There are lots of widget configuration options! Then, you can follow these instructions to embed the script in Canvas. Slide 15. Diigo to Inoreader, then Redirect Tool. This assumes you are already using Diigo; if you are not using Diigo already, this is a good reason to start! I’ve written up a post about the RSS-Inoreader magic here; because Diigo has RSS, everything in that post applies to Diigo just the same. Slide 16. Padlet: Redirect Tool. Because the Padlet site design is really clean, it looks great in Canvas. Just install the Redirect Tool app, copy-and-paste in your Padlet URL, and you are good to go!
Slide 17. Special Advantages of Each Tool. The main message I’d like people to take away from this presentation is that each of these tools is excellent, and the key is to define your goals so that you can choose the best one, or maybe even an entirely different tool. There are so many great web-based tools these days!
Slide 18. Flickr: Album Editing Options. Flickr is a serious image management tool, and you have so many options for rearranging the contents of an album. That is not true for the three other tools, which have limited options for rearranging content or no options at all. Slide 19. Flickr: Works Well in Small Size. Another distinctive thing about a Flickr slideshow is that it looks great in a small size, so that you can even fit it nicely into a Discussion Board prompt. (I regularly put Flickr slideshows in the sidebars of my blogs because they fit so nicely there too!)
Slide 20. Pinterest: Students Love It! I really like to use tools that my students are going to like using, and that is a big plus for Pinterest. Many of my students are already serious Pinterest users, but they don’t think of it as a tool for school. They are excited to find out about new features of Pinterest that make it a great tool for schoolwork. Here are my Pinterest Tech Tips. Slide 21. Pinterest: Pin Pages for Discovery. Given the billions of images at Pinterest, it can provide excellent discovery based on related images, often leading you to Boards with valuable resources by serious collectors, including museums who use Pinterest. This slides hows the related pins that Pinterest found for the Varanasi image that is in my Indian Stories Board. Especially if you combine Pinterest with Google Reverse-Image search, so students can learn more about the images they find, Pinterest can become a very useful research tool!
Slide 22. Diigo: Managing Massive Amounts of Stuff. If you are curating massive amounts of stuff (as I usually am), Diigo is the most practical choice. Flickr is pretty good too (it offers some good searching and tagging options), but Diigo still wins for scalability. As an all-purpose curation tool, Diigo is really fantastic; I cannot say enough good things about it! (I know some people who are huge fans of Pinboard, too… I’m guessing the same strategies I’m suggesting here for Diigo will work in Pinboard as well.) Slide 23. Diigo-Inoreader: Totally Automatic Updates. Admittedly, it takes just a few seconds to add an image to Flickr or to pin something at Pinterest or to post something on a Padlet, but depending on how you set up your workflow, the Diigo-Inoreader process can be 100% automatic so that content is feeding into your Canvas Pages automatically as you create your content. Since I use Diigo for all my curation and content management, it’s a no-brainer for me to build a Diigo feed for any project I am working on. The fact that it just takes the Redirect Tool to add that to Canvas makes that an even more enticing prospect!
Slide 24. Padlet: Totally Fun Collaboration. You can create Padlets with different settings for content creation and content commenting, making it possible for your students to post at a Padlet in Canvas, seeing others’ contributions in real time. It’s so much more fun than a Discussion Board. Try it out at this Padlet Playground (which is set up with “secret” as the privacy setting, so that only people with the link can post). If you search the Canvas Community, you will find advice from other users who have much more experience with Padlet than I do: Padlet at Canvas Community. Slide 25. Padlet: Truly Easy Tool. As I mentioned above, Padlet wins hands-down for ease of use: it is easy to create a Padlet (they have a great step-by-step process to help you configure your settings), and then it is easy to put into Canvas with the Redirect Tool (see above).
In future presentations, I will probably focus on just one tool at a time (so I’ll try to do a CanvasLIVE all about Flickr, all about Pinterest, all about Diigo, all about Padlet)… but I was excited at the chance to show them side by side for the same content stream, and I hope that has been useful! Meanwhile, since I had to rush through the details, please let me know if you have questions about any of these tools or if you want to brainstorm about ways you can use them in your classes!
Here’s my Freebookapalooza slideshow, with the video from the June 15 event. There are lots of links in the notes below because I was not sure if I would be able to do the event or not; I had my wisdom teeth out that morning!
Slide 5: Dimensions of Curation. This is a slide from last time to remind people about the different dimensions of curation. I really emphasize all of these except for tracking; I get anecdotal feedback from my students, but I don’t really do a lot of analytics (although with Blogger, I could).
Slide 6: Bookmarking Tool: Diigo. Having a bookmarking tool is the key to good curation. I use Delicious for many years, then it went belly up, and I switched to Diigo. It took me a while to appreciate Diigo, but now I love it! See this post for details: My Favorite Features about Diigo and Canvas.
Slide 7: Freebookapalooza at Diigo. The Diigo tags let you browse the Freebookapalooza in lots of ways. Blogs are great for presentation, but the Boolean searches you can do with Diigo bookmark tags make it useful in a different way than the blog.
Slide 8: Publishing Tool: Blogger. I’ve used Blogger for years and since my favorite feature of blogs is navigation-by-labels, Blogger works great for me. Blogger’s native label widgets are actually more powerful and easier to configure than WordPress (although of course you can get WordPress plugins and do programming that go far beyond Blogger labels). Another reason I like Blogger is that it is the choice of most of my students, and I like using the same tools that my students use. More about blogs and labels here: Blog Labels: When you want students to explore…
Slide 9: Freebookapalooza Blog. I hope you will take a few minutes to just browse the Freebookapalooza and see how it works. Maybe you will find some books that you like! There are almost 1000 books here chosen for my Myth-Folklore and Indian Epics classes, giving the students a huge library of full-text books online to browse and use.
Slide 10: Online Books and Other OER. This approach works for ANY kind of online educational material you want to collect and share. For example, if there are Wikipedia articles that you know are useful to your students, bookmark them, organize them, and share them back out with your students. You can do that in ways that will be far more engaging than just a list of links, and more productive than just having your students wander Wikipedia without your guidance to get them started.
Slide 11: Bookmarks to Blog & Back to Bookmarks. For the process of moving from Diigo to Blogger and then back to Diigo again, see this blog post: Freebookapalooza: A Web-Based Curation Adventure. Both Diigo and Blogger have powerful features, and I like to exploit them both!
Slide 12: Step 1: Bookmark every possible item. Even though I ended up with almost 1000 books in the Freebookapalooza, I still have hundreds of items that I have not cataloged yet, patiently waiting in my Diigo bookmarks until I have time to add them.
Slide 13: Step 2: Annotate and publish the best items. For details about the blog post scheme I used, see this post: Web-Based Curation. The most important decision I made was to include the table of contents. That sometimes took a little time if I had to transcribe it myself (or correct really poor OCR), but it was worth it because the students can really see what’s in each book, and it dramatically increases the power of searching at the blog.
Slide 14: Step 3: Delete old bookmark, save new. One of the things I like best about bookmarks and labels is that you can use it to manage your workflow!
Slide 15: Libraries that Scale: S, M, L, XL, XXL, XXXL.When I started the Freebookapalooza, my goal was to have around 100 books so I could share a new book in the daily announcements each day… but it grew and grew and GREW. And it would be even bigger if I had had more time. So, I can testify that this approach works at any scale, and it allows you to grow from something small to something big. Really big.
Slide 16: Flexible Architecture: Labels. The labels are the key: by letting the blog post labels be the navigation architecture at your blog, you don’t have to do anything except label each new post carefully, and then create the label widgets you want to use in your sidebar. More here: Blog Labels. The flexible architecture of blogs is the key difference with Canvas content: there is no content architecture in Canvas besides the inflexible previous-next system you assign via the modules. The actual Pages and Files area are a mess, even at a small scale. At large scale, they are impossible. On that, see the very informative and heartfelt comments from Canvas users who want folders for their Pages.
Slide 17: Same Content: Different Labels. Even better, labels let you design different ways to navigate the content, based on your users’ different needs. In my new Aesop’s Books project this summer, for example, I love the way I can make instant “book galleries” (showing all the fables in a book) and “fable galleries” (showing all the different versions of the same fable) simply by making sure i have a book label and a fable label for each post. I just label; Blogger does all the navigation and page-building for me, automatically.
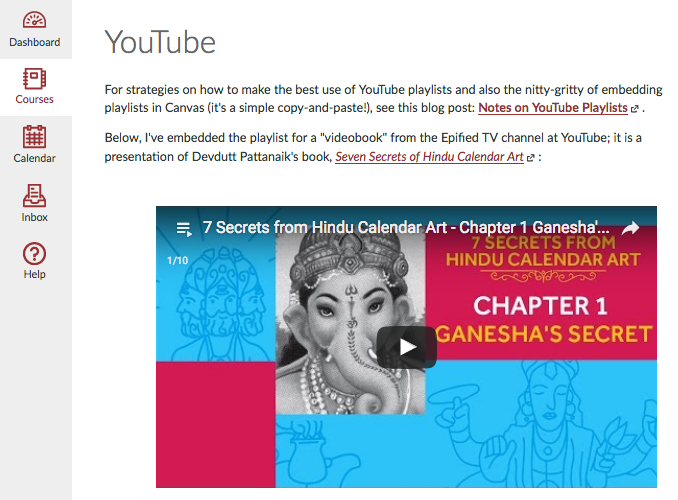
Here’s my YouTube Playlist slideshow, with notes and links below, plus the YouTube video. You can find out more about the CanvasLIVE event at the Canvas Community site.
Slide 4. Taming the Web: The Power of Curation. Today I’m going to be talking about YouTube, and part of what I’ll be showing you is some technical nitty-gritty about playlists and about embedding playlists in Canvas (or anywhere; you can embed playlists in blogs, wikis, websites, etc.), but I also want to talk today in general about CURATION, the role that we all play today in trying to organize the enormous amount of resources that are available to us in the digital world. So, curation will really be the main theme of my talk today, and how creating YouTube playlists is a really powerful act of curation, and then curation will also be the theme of the other two CanvasLIVE talks I have coming up: on June 15 I’ll be talking about curating online books and other open educational resources, and then on June 29 I’ll be talking about image curation using Pinterest and Flickr.
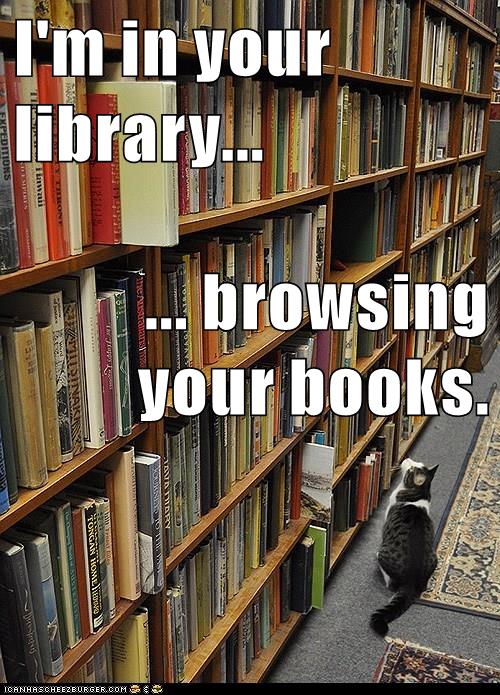
Slide 5. Before the Web: Books and Libraries. I don’t know about you, but the word curation is not one that was part of my world when I was in school myself as a student. I did all my schooling (all my decades of schooling!) in the years before the Internet. So, that was a world where information existed in books, and those books were found in libraries or, if you had the money, you could buy books to have in your home. Then there was also the information that you had in your head, and a big part of the schooling process was transferring certain information from certain books into your head, and being tested on that. There were a lot of books, of course, and those books contained way more information than you could ever hope to transfer to your head… but you didn’t really think about information itself as something that you had to organize for yourself, even as a teacher, much less as a student. The information was in the books (especially the textbooks) or in the magazines or in the newspapers, and while it might take some effort to find the information you needed, the information was all nicely organized for you.
Slide 6. The Information: A History, A Theory, a Flood. But then came the Internet, and the information explosion in our newly digital world. If you want to learn about that, I cannot say enough good things about James Gleick’s book The Information. He is one of my favorite writers, and this is my favorite of his books. Admittedly, there are a lot of people, even teachers, who still have not figured out how this is supposed to work, and they attempt to resist the digital world rather than adapting to work with it. They still want to rely on textbooks and getting information into their students’ heads, and insofar as they use digital materials, they want those digital materials to mimic the old world of printed books and the libraries that contained those books.
Slide 7. Information Overload and Content Curation. For me, though, the Internet is what I always wanted: infinitely big libraries without boundaries, a world where there is no shortage of information. Instead, there is now a superabundance of ever-growing and changing information — not just books but also images, audio, and video — and the challenge that we face as teachers is how to organize that information, finding the best and most valuable resources for our own purposes, while also teaching our students how to find the best and most valuable resources for their own purposes too (see John Spencer on this important topic). One word to describe that process is CURATION.
Slide 8. YouTube Video Explosion. YouTube is a great example of the digital explosion… and the subsequent need for curation. The first video was published at YouTube in 2005 and now, in 2017, about 5 billion videos are watched each day, and over 400 hours of video are uploaded every minute (source). YouTube is also an incredible mess, especially since it is very hard for Google to provide index and search services for video materials, much more so than text-based materials. For sure there are incredibly valuable materials on YouTube, materials that can really help us in our work as teachers, but it is not easy to find what you need. You can rely on trusted sources, like TED or PBS or Khan Academy, etc., but that is only a tiny, a very tiny fraction of the available video. You can also rely on word of mouth, and one of the most important reasons for teachers to network is so that we can share our discoveries, telling others about some great video that we have found and passing it on.
Slide 9. YouTube Playlists: Learn and Share. And that, my friends, is what curation is all about: keeping track of the great materials you find online so that you can make good use of those materials yourself and also share what you have found with others. This is also the theme of connected learning (which is the pedagogy banner I am usually waving): Learn, and then share what you have learned.
Slide 10. Dimensions of Curation. Now there are all kinds of ways you can curate, and different roles you can play as a curator, different priorities you might have. This graphic provides a nice set of categories to think about (source). If you poke around in Google, you can find all kinds of graphics and infographics about the curation process. What’s fascinating to me about the topic of curation is that it is not just something that teachers are thinking about; it is also a huge concern to anyone who is communicating information online. That means you can get ideas from people in many different professions and — here’s the best thing! — you can help prepare your students for those different professions by teaching them about curation and making that an explicit part of what you do as a teacher. You are curating information as the teacher of the class, and you can also be teaching your students how to be information curators as well. I create YouTube playlists, for example, and I also teach my students how to create YouTube playlists. I embed playlists in my blogs, and I also teach my students how to embed playlists in their blogs. We are co-learners… and co-curators!
Slide 11. My YouTube Channel and Playlists. So, now I’ll talk some about YouTube and playlists. Playlists are a way that YouTube lets you collect videos and organize them as part of your YouTube channel. If you have a Google account, that means you have a YouTube channel, although most people don’t spend a lot of time organizing their channel. I made a conscious decision a few years ago to clean up and organize my videos because they were really just getting totally out of control, and that was a really great decision, one that has paid off tremendously in being able to offer my students lots of high-quality video options in my classes. So, before I get into the details of how playlists work and the cool things you can do with them, let me quickly run through some of the playlists that I use in my classes now.
Slide 12. Growth Mindset Playlist. A theme I emphasize in both of my classes is growth mindset, and I have this growth mindset playlist for students to browse; they can then do a “learn about growth mindset” assignment each week, reading an article or choosing a video to watch, and then writing up a reflection blog post with their thoughts. I also have a related set of videos that I call Learning by HEART which explores related meta-themes like health, happiness, empathy, attention, reading and time (that’s where the H.E.A.R.T. acronym, or, rather, backronym comes from).
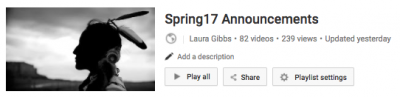
Slide 13. Daily Announcements Playlist. As you might know from an earlier CanvasLIVE about using a blog-as-homepage, I do daily announcements for my classes, and I include at least one video every day. I build a playlist of all those videos each semester so that students can go back and browse through past videos. Here’s the playlist that resulted from the daily announcement videos in Spring 2017.
Slide 14. Indian Music Playlist. I teach a course in Indian Epics which might turn out to be the only course about India that my students will ever take, so in addition to teaching them about the Ramayana and the Mahabharata, I also try to expose them to Indian culture more generally, and of course music is one of the most beautiful dimensions of Indian culture. I use YouTube music videos to share music from India with them; I have an overall playlist of Indian music, plus individual playlists dedicated to my favorite musicians like Manish Vyas, Anoushka Shankar, and, my favorite of favorites, Maati Baani.
Slide 15. Videobook Playlists. I am very fortunate that the Epified TV channel in India has created “video books” for one of my favorite authors, Devdutt Pattanaik (he’s at Twitter too!). They release those videos singly, but I then put them into playlists which I can share with my students. The latest one they have done is Secrets of the Goddess(which is also available as a cheap Kindle book for my students who want/need a text to go with the video). For many of my students, reading is a chore, but the ability to listen to and also watch a book being presented in this way really appeals to them, and I am really grateful to Epified for making all this amazing content available for my class.
Slide 16. CanvasLIVE Playlist. And while it’s not for my classes, I also have a CanvasLIVE video playlist… to which I’ll add this video as soon as it is ready. One of my main motivations in doing these CanvasLIVE presentations is the fact that we are using YouTube as a platform, and that I can share the videos in the form of a YouTube CanvasLIVE playlist.
So, those are some of the playlists I am using. Of course, you can snag any videos that I am using if you think they can be useful to you (that’s the power of curation AND sharing), and even if the actual contents are not useful to you, perhaps some of the strategies and approaches I am using — daily videos, videos for enrichment, videos to supplement text-based content — will inspire you to think of new ways you can use video systematically as part of your teaching.
And now on to some of the nitty-gritty for how you create and manage playlists. Luckily, it is all really easy!
Slide 17. Creating Playlists. I’ve written out some instructions for my students on creating playlists, and you can use those same instructions: Creating Playlists. (You’ll see there that I used a Shankar Tucker playlist as an example there, and I pinged him at Twitter when I first created these instructions… and we had a Twitter back-and-forth as a result! That’s another really fun thing about working with artists who are social-media-aware; you can connect with them directly sometimes at Twitter or wherever they are active online.)
Slide 18. Managing Playlists. You will probably be adding new videos to your playlist, and possibly removing videos also. When you look at a playlist page, you have options to rearrange the order of a playlist, and also to choose the thumbnail for the playlist display. You can also add annotations there, although the options for annotation are really primitive; in particular, you cannot include active links, just the raw URL, the annotations can only be very short although I’m not sure what the actual character limit is. As a result, I have pretty much given up on doing annotations there at YouTube, although it is possible; if I were to be allowed one change to make at YouTube playlists, it would be for real links and extended space in the annotations box.. For more information about managing playlists, see this post at my Canvas blog: YouTube Playlists.
Slide 19. Embedding Playlists. And here’s where the real excitement begins: you can embed a playlist, and you can have the playlist start either at the beginning automatically (based on whatever the current video is at the top of the list), or you can embed a specific video with backwards/forwards buttons that take you to the other videos in the playlist (based on whatever the current order of the playlist is). By default, the playlist will keep on playing until it gets to the end of the list. I’ve written up instructions for how to embed here: Embedding Playlists.
Slide 20. Embedded Video-in-Playlist. So, for example, when I embed a video in the daily class announcements, I do that by putting the new video at the top of the Announcements playlist, and that means students can play not only the video for that day, but they can let the playlist keep on going to catch any videos they might have missed and/or want to see again. See the post here.
Slide 21. Embedded Playlist. I also embed playlists in the sidebars of my blogs; for example, here is the Indian music playlist in the sidebar of one of my India class blogs: Indian Epic Images.
Slide 22. Playlists in Canvas. It’s also easy to embed a playlist in Canvas; here’s a Canvas page where I have actually embedded three different videos: one is a randomized video that I made with a javascript (more about that in my CanvasLIVE on javascripts), plus two embedded playlists.
And here’s an important tip about embedding playlists: when you embed the whole playlist, as opposed to a single video, the top video in the list is what gets displayed OR the thumbnail (depending on the web context). So, to keep your playlists fresh, you can set yourself a reminder to move the bottom video from the playlist up to the top and make it the thumbnail. If you do that every few days, your playlist stays fresh even if you are not adding actual new videos. That’s what I do with the playlists I embed in my blog sidebars. That way, students returning to the blog once or twice a week see a new video each time (new in the sense that they have not watched them before).
So, as you can see, there is not a lot of nitty-gritty in this presentation compared to other CanvasLIVE presentations I’ve done: YouTube playlists are both incredibly powerful AND incredibly easy. It really just takes a desire and a commitment to curate… there’s no special technical expertise of any kind that is involved here.
Slide 23. Advantages of Playlists. And in order to hopefully inspire a desire for curation, let me know quickly run through the advantages that I see in using YouTube playlists:
1. Save those videos! With playlists, I can quickly save the videos I see making the rounds here at Canvas Community, at Twitter, and at Google+. Before I started curating, I lost track of so many fabulous videos at YouTube that I will probably never find again. Now, when I see a video I think I want to use, I save it in a “to-do” playlist, and then later, when I have time, I put it into the right playlist(s) for my classes. That way, I know where to find the video again, while also sharing it with my students.
2. I provide the students with an endless supply of good videos to watch. Every video that I share with them is in some kind of playlist, which means there are more videos if they want, right there, as chosen and arranged by me. That is one of the real services I can provide to them as a teacher: I have the time, expertise, and eagerness to go out there and create collections of videos that can offer a good learning opportunity.
3. I put the videos in context. One of the biggest problems with YouTube, and with the Internet in general, is that information becomes decontextualized. One of the most important things we do when we curate content for our students is to put that image in context, and by sharing videos in playlists, that playlist provides the students with valuable context, increasing the value of every video in the playlist.
4. I model curation and sharing for my students. All my students are aware of YouTube, of course, but many of them have not thought about having a YouTube channel where they can create playlists. I show students the value of sharing videos in playlists, and I also encourage them to do the same, teaching them how to create their own playlists.
5. I increase the value of the Internet. Seriously! The Internet needs content creators… and it also needs content curators! So, by creating and sharing my playlists, I increase the value of each video on that list by putting it in the context of a playlist. The videos become more useful to any human being who encounters one of my playlists, and the playlists are also useful to the Google Mind, helping Google to understand what videos are related to each other. As I mentioned earlier, Google has a hard time searching and organizing video content (more so than text-based content), so by creating playlists we are helping Google figure out what’s going on with these videos… and Google really does need our help with that. So, give Google a break: organize your videos in playlists. You, your students, and the Google Mind will all benefit.
Slide 4. Connected Learning and Chance Encounters. The theme I want to emphasize here is content serendipity, as opposed to content mastery. Especially in Gen. Ed. Humanities courses, like the ones I teach, mastery and coverage are not really the goals. Instead, for me, the goal is to get each student connected to something in the realm of reading and writing that they really care about, something that excites them, something that inspires them. That might be different for each student, and it might require sifting through massive quantities of content. By using the power of daily content and random content, you can expose students to a lot of content, and maximize the chances that something will click.
Slide 5. Javascript Randomizers.
I use javascript randomizers in all my class blogs (especially the sidebars) and at my class wiki. It means students see new content each time they return to a page, and the randomness is fun and unpredictable. Most importantly, randomness is a way to surface lots of content. If you have lots of links or images you want to share with students, displaying them all at once is not effective, but displaying something at random means that, over time, students will see all the content, a little bit at a time.
Slide 6. The Fates Say…
The first javascript I ever used was a little randomizer that I wrote myself by hand way back in 2002. This was the first semester I taught online, and my students were choosing between two units to read each week. I offered them a link that say “Let the Fates decide…” and then a message popped up at random with “The Fates say…” (and then a 50-50 chance of one unit or the other). Students loved it! They sometimes would write in their blog, “I chose Ovid because the Fates said Ovid three times in a row.”
Slide 7. Creating Your Own Javascripts.
Because of the success of that randomizer, I knew I wanted to use lots of randomizers, but I did not know any programming and did not have time to learn. So, I hired a genius student, Randy Hoyt, to build a tool for me that would take the content I supplied and turn it into a javascript, either date-based (“___ of the Day” for example) or at random. He created that tool back in 2003, and he is still hosting it online for free at his website: RotateContent.com. Thank you, Randy! (And in addition to being a genius programmer, he also designs board games: Foxtrot Games.) You can show Randy some love at Twitter.
Slide 8. Javascripts and Canvas.
Using javascripts in blogs and webpages is easy, but Canvas does not let you just paste a javascript into a Page. There is a workaround, though: you just need to create an HTML page in an https webspace which contains the javascript, and then you can use an iframe to display the HTML page in a Canvas Page, in the Syllabus, in a Discussion Board, etc. etc. This technique works for Rotate Content scripts and also for Twitter javascripts widgets; see my Twitter4Canvas Workshop for details. You can also do this with javascript widgets from Flickr and from Pinterest.
Slide 9. Laura’s Widget Warehouse.
But don’t let all of that scare you: I’ve already created some ready-to-use Canvas widgets where you can just copy-and-paste the iframe from my Canvas space into yours. They are all in the Widget Warehouse, and you can also just browse the raw content and use that too if you want.
Slide 10. Agenda for this Presentation.
So, I’ll be covering those three topics in more detail: in Part 1 I’ll discuss the different types of javascripts you can create with Rotate Content, then in Part 2 I’ll show some of the ready-to-use Canvas scripts in my Widget Warehouse, and finally in Part 3 I’ll walk through the steps you can follow to create your own scripts with Rotate Content and use them in Canvas.
Slide 11. Part 1: Rotate Content Scripts.
The Rotate Content tool takes an HTML table that you prepare and converts it to a javascript. I’ll discuss the types of content that you can put into the table and then the types of scripts that it will generate.
Slide 12. Types of HTML Content.
You can basically put ANY kind of HTML content in the table. That can be simple text and links (example), images (example), embedded video (example), or even other scripts (example: this page calls a script at random from among all the scripts in the Warehouse). The key thing to remember is that everything must be https, and that includes images you might be using.
Slide 13. Rotate Perpetual Date.
In addition to displaying a range of content, you can configure the script in different ways. There are two kinds of date-based scripts: perpetual and specific. You use a perpetual calendar to create content that will recur year to year based solely on the date. For example, the Latin LOLCat Calendar has 366 items (Leap Year!), with a new cat for each date.
Slide 14. Rotate Specific Date.
You can also create content that you use for a specific range of dates in a specific year. That is how my semester countdown widget works; I change the dates for this one every semester.
Slide 15. Rotate Random.
This is what I use most often: the totally random javascript. In this HTML table, there is no date column; just the word “random” in the cell for each row. You can make randomizers with just two items or with hundreds of items. My Freebookapalooza widget has hundreds of items for example.
Slide 16. Rotate Date-Based AND Random.
Randy also built in a very nice feature so that if you do have a date-based widget, you can use that same content randomly. To do that, you just change a variable in the script call; the script itself is the same. You can compare the two different ways of displaying the Elizabethan Proverbs widget here: date-based and random.
Slide 17. Part 2: Laura’s Widget Warehouse.
Each page in the Widget Warehouse contains a link where you can find the script and the iframe version you need in Canvas, along with a link to the raw HTML table so that you can browse and re-use the source material directly if you want. Slide 18. Random Motivation. Slide 19. Random Humor. Slide 20. Random Resources. Slide 21. Random Art Images. Slide 22. Random Student Work.
Slide 23. Part 3: Creating Your Own Scripts.
To create your own scripts you need to feel comfortable editing HTML, either with an HTML editor or editing by hand (I usually create my tables using a Google Sheet; it’s faster than editing a table). You also need your own https space. I am very lucky that my school has a Domain of One’s Own project with Reclaim Hosting, and I cannot say enough good things about the people at Reclaim. Even if your school does not offer web hosting, you can get excellent individual hosting. They really know how to work with and support educators!
Slide 24. 6-Step Canvas Widgets.
This is just a quick overview of the process of creating javascripts using the Rotate Content tool. You will find detailed instructions at the Rotate Content site for Steps 1-2-3-4. The two additional steps are required to get the javascript to work in Canvas. Please feel free to contact me with any questions you have about this, and based on people’s feedback I can create some more specific tutorials if you want. Slide 25. Generate HTML table. Slide 26. Enter content in table. Slide 27. Convert table to script. Slide 28. Publish the javascript. Slide 29. Create and publish HTML script page. Slide 30. Use iframe in Canvas.
Slide 31. Presentation Recap.
Please go browse the Widget Warehouse and see what you think. Maybe you will find some scripts there you want to use, or even just some content that is useful to you. And if you get some ideas for scripts of your own, you can use Rotate Content to create your own scripts. Maybe you will want to build a Widget Warehouse of your own to share your scripts with others too!
Slide 32. Let’s connect! Please feel free to contact me with any questions, ideas, or suggestions. 🙂
Here’s the Growth Mindset Slidedeck for the CanvasLIVE presentation, with notes and links below, and I’ve also embedded the YouTube video of the event. 🙂
Slide 3. Connected Learning… with Cats.
You can find the complete series here at this blog: Connected Learning with Cats. I’ve got four more events scheduled after this one: Javascripts, YouTube Playlists, Free Online Books, and Pinterest/Flickr. Let me know what other topics would be of interest!
Slide 4. Five Key Mindset Concepts.
In Part A of the presentation, I’ll describe my approach to the growth mindset concept with these five key ideas.
Slide 5. Carol Dweck: Mindset.
I recommend Carol Dweck’s book Mindset very highly, and you can also find some excellent Carol Dweck videos along with articles and interviews online. She is extremely good at speaking to a wide range of audiences: teachers, parents, and learners of all kinds.
Slide 6. Five Design Strategies.
In Part B, I’ll explain how I use growth mindset ideas when I design my courses.
Slide 7. Five Tools at the Website.
In the final part of the presentation, I’ll provide an overview of some helpful tools I am using to build a new open Canvas course resource: Exploring Growth Mindset which has this simple URL: Mindset.LauraGibbs.net.
PART A: FIVE KEY MINDSET CONCEPTS.
Slide 8. Five Key Mindset Concepts.
I approach the growth mindset concept from different angles: Aim High — Explore — Work Hard — Improve — Enjoy. You might decide to break down the mindset concept differently for your students; this is what I have found works best for me!
Slide 9. 1. Aim High.
This area involves setting realistic personal goals, along with being willing to take risks to achieve those goals, and persevering. One thing I find really helpful is to get students focused on moving forward; don’t try to retrace your steps, but just keep on looking ahead to figure out what to do next! There are articles and more resources here.
Slide 10. 2. Explore.
This is probably my personal favorite among the growth mindset domains: curiosity and creativity. This is also where I locate research on neuroplasticity and the fact that as you learn, you are literally growing new connections in your brain. Given that many of my students are future medical professionals, this is definitely something I like to emphasize in the growth mindset approach. There are articles and more resources here.
Slide 11. 3. Work.
Side by side with open-ended exploration is the need to stay focused, work hard, and be patient as you put in all the practice that is required to learn new skills. I teach writing, so practice is a huge part of that process, and patience is definitely required! LOTS of patience. There are articles and more resources here.
Slide 12. 4. Improve.
As a teacher, there is where I put in the most effort: students need detailed, helpful, timely feedback in order to learn from their mistakes. I also urge the students to do a lot of self-reflection and to see themselves as learners beyond the scope of the course: my biggest goal is to help them become self-determined learners for life! There are articles and more resources here.
Slide 13. 5. Enjoy.
By fun and enjoyment, I have in mind the joy of learning itself, along with connecting and sharing with others. Plus, it’s important to take care of yourself: learning is hard work, so you need to make sure you take time to relax. You can’t afford to neglect health or happiness if you want to succeed over the long run! There are articles and more resources here.
PART B: FIVE DESIGN STRATEGIES.
Slide 14. Five Design Strategies.
These are strategies that work in my classes, and I am guessing they can be generalized to other classes as well: Teach about Mindset — Reinforce Daily — Create Challenges — Focus on Feedback — Be a Co-Learner.
Slide 15. 1. Teach about Mindset. I start the semester with a growth mindset activity in the first week of class: Week 1 Growth Mindset. This TED talk by Carol Dweck is one good way to get started, and my students then share their thoughts and reactions in a blog post (my students all have their own blogs), although of course a discussion board could work also. Students usually have a lot to say on this topic!
Slide 16. 2. Reinforce Daily. I use Growth Mindset Cats every day in my class announcements, and you can find out more about the daily announcements: CanvasLIVE on Blog-as Homepage. There are Growth Mindset Cats both in the body of the announcements and in the sidebar, along with random student quotes from their blog posts in the sidebar as well.
Slide 17. 3. Create Challenges. Students can complete weekly growth mindset challenges of their choice; developing new kinds of challenges is one of my goals for this summer. In addition, as students work on their writing, I pose that process in the form of writing challenges. For those of you who teach writing, I have found this to be really successful: it helps students remember that learning how to write is a long-term growth process, and it also encourages them to set goals for themselves as part of that long-term process.
Slide 18. 4. Focus on Feedback. I am constantly trying to improve my own feedback practices, while helping students understand both giving and receiving feedback. This is where I spend the largest chunk of my time as a teacher, and I try really hard to couch my feedback to the students in terms of growth mindset concepts.
Slide 19. #TTOG Teachers Throwing Out Grades.
I also have to say something here about the need to stop punitive grading if we want students to trust us that learning from mistakes is really okay. If it’s really okay, we have to stop penalizing for mistakes and instead focus on recognition of learning progress. You can read about how I’ve tried to do that in my classes here: all-feedback-no-grades.
Slide 20. 5. Be a Co-Learner. Probably the thing I like best about growth mindset is that I am constantly working on my mindset, side by side with my students. We are COLEARNERS. Admittedly, our goals are different (I’m trying to learn how to become a better teacher; they are learning how to become better writers)… but growth mindset allows us to see those different goals as part of a shared growth process.
PART A: FIVE CANVAS-FRIENDLY TOOLS.
Slide 21. Five Canvas-Friendly Tools.
I’ll finish up with a quick overview of my new Canvas course resource site: Exploring Growth Mindset. My goal is for this site to have a continuous stream of new content automatically. I am not going to have time to update it when the school year begins, so I need it to update based on my normal web activities which is based on using these tools.
Slide 22. 1. Flickr & Pinterest. As I create new mindset cats, I add them to my albums at Flickr and at Pinterest. Both of these tools are easy to embed inside a Canvas course, and I’ll be doing a CanvasLIVE presentation later this summer about using Flickr and Pinterest in Canvas: Beautiful Curation: Pinterest and Flickr in Canvas.
Slide 23. 2. Diigo Bookmarks. As I find new resources, I bookmark them with Diigo, and they then appear automatically in Canvas. My current focus is transcribing infographics. To get the Diigo bookmarks to appear in Canvas, I use an RSS tool called Inoreader; if that is something you are interested in, get in touch with me, and I will be glad to share details about how that works.
Slide 24. 3. Twitter. I have a dedicated Twitter account, @MindsetPlay, that I use just for growth mindset and related materials. You can see the live feed inside the Canvas course, and I did a CanvasLIVE that explains how to use real Twitter widgets this way inside a Canvas course: Twitter4Canvas CanvasLIVE.
Slide 25. 4. YouTube. I have a YouTube playlist of growth mindset videos. Please send me suggestions of videos you find useful in teaching about growth mindset with your students! There’s a Feedback form at the site you can use for that. Also, I have a CanvasLIVE about YouTube Playlists coming up this summer: Amplify YouTube with Playlists.
Slide 26. 5. Padlet.
I am really excited about using Padlet to collect and share thoughts from my students about their growth mindset experiences. I find their ideas to be really inspiring! You can read more in my Canvas Community blog about Padlet and my Padlet Randomizer. I’ll be doing a CanvasLIVE on javascript randomizers like this: Laura’s Widget Warehouse: Canvas-Friendly Javascripts.
Slide 31. Let’s connect! And I’m glad to discuss and brainstorm about any and all of those things! You can reach me at Twitter: @OnlineCrsLadyand at the Canvas Communitywhere I’m now blogging regularly.
Slide 3: Connected Learning with Cats slide. This is the second in a series of Connected Learning with Cats demos for CanvasLIVE. Check out #CLCats at the Community, and you can find more information at the Connected Learning Cats posts here at my blog.
Slide 4: More Canvas Projects. This slide provides links to some other Canvas projects I am working on. You can find all of those links here on the About Me page which I’ve put inside the Canvas: Growth Mindset course, my newest project!
PART A. Blog Tour. I’ll start off by showing you around the blog that I use for my class announcements.
Slide 5. Announcements as Exploration. I see announcements as a way to get important information to students, but also as a way to encourage them to explore, learning things to satisfy their curiosity and grow as learners. It’s not about “class content” in the sense that everybody in the class needs to read it and learn it. Instead, it’s more open-ended, trying to find ways to connect to the students one by one, across that wide range of individual interests. So, even if blog-based smorgasbord announcements aren’t a good fit for your class, you might still get some ideas here about open-ended, wide-ranging content “extras” that you can include in your classes.
Slide 6. Examples of Blog-as-Homepage. You can see how I do this in my two classes: Myth.MythFolklore.net and India.MythFolklore.net. How you might choose to organize your announcements blog would totally depend on your class, your students, their needs. My announcements blog has evolved over the past 10+ years, so I can assure you that it is a strategy that works for me. I was really glad to learn how to embed my announcements blog in Canvas just as I did for many years in D2L (the LMS we used for 10 years prior to Canvas at my school). I cannot answer people’s questions about the standard ways of doing announcements in Canvas because when we moved this year from D2L to Canvas, I just carried on with my embedded blog, just as I had done in D2L.
Slide 7. Class Business Section. There’s always a paragraph at the top with a reference to the day and week (there are new announcements every day, including Saturday and Sunday). I put the most important information that people might need in that top paragraph. Below that is a section called “Class Procedures and Reminders” which I try to keep to at most three items per day. These are paragraphs specifically related to class activities, especially any assignments that are due. I don’t have any images here, just text and links.
Slide 8. Fun Section. The rest of the body of the blog post contains stuff that is for fun and exploration. Each item has some kind of image or video that goes with it, and I’ll say more about that in the next part of this presentation.
Slide 9. More Fun in the Sidebar. The sidebar contains more fun stuff, all of which is dynamically generated. The sidebar is not something I have to edit; instead, the content creates itself. There are javascript randomizers from my Canvas Widget Warehouse, and I also have a Twitter stream there (find out more at Twitter4Canvas). More about the sidebar here: The Sidebar Never Sleeps.
Slide 10. What about Mobile? I use Blogger which has great support for mobile. It automatically detects when the browser is being used over mobile, and it defaults to a mobile view, suppressing the sidebar. You can simulate Blogger mobile view by adding ?m=1 to any Blogger blog or blog post address just to see what that looks like. That way I can be sure that the blog is useful to students whether they are watching it in the mobile view or in the laptop view with the sidebar. (My students mostly use laptops for their classwork since both classes are writing-intensive, but I know they use Canvas to check in on the calendar and announcements using their phones.)
Slide 11. Every DayAnnouncements. Blogging really lends itself to an “every day” approach, and that’s the approach I take with announcements. It’s also my philosophy of education in general, where I try to encourage my students to learn a little bit every day as opposed to the binge-and-purge learning that is so common, especially in higher education where classes don’t even meet every day. I don’t expect my students will actually read the announcements every day, but if they do, I have something to offer them!
PART B. Examples of Fun Stuff. I’ll show some examples here of the kinds of fun stuff I share with my students, focusing on the content that I’m also sharing through my Canvas Widget Warehouse, which means the content is all shared with you as well, ready to be deployed in your Canvas course Pages if you want.
Slide 12. Growth Mindset Cats. These are so popular with the students that I include them both in the sidebar and in the daily posts. You can find out more here: Growth Mindset Cats Widget. I’ll be doing a presentation on the Growth Mindset Cats for CanvasLIVE on April 20.
Slide 13. Free Books. I have a huge Library of Free Online Books for my students, and it is one of the main ways I hope to inspire them to keep on reading and learning after the class is over. You can find out more about the Freebookapalooza here. I’ll be doing a Freebookapalooza presentation for CanvasLIVE on June 15.
Slide 14. Student Projects. I love featuring student work in the daily announcements, both in the post and in the sidebar. Students can get ideas and inspiration from seeing other students’ work, and it also shows them that their work is important too, something that will live on in future classes. You can find out more about my Student Project Archive here.
Slide 15. Motivation. I’m a big believer in motivational graphics along with inspirational proverbs and memes. I’ve got lots of different collections of graphics and memes which you can explore at the Widget Warehouse.
Slide 17. Ask Your Students. Especially as you are developing the content to use in your announcements, ask your students! My students can choose an extra credit option each week to tell me what their favorite item was from the announcements (which is also a good way to get them to go back and review the announcements!), and that way I learn which kinds of content they are really connecting with. As a general rule, asking your students is pretty much the best way to improve your classes IMO.
PART C. Advantages of Blogging. These are the advantages of blogging, both for class announcements and also as a general practice.
Slide 18. Blogging and Co-Blogging. My classes consist of student blog networks, and so it is very important to me that I show the students how blogs can be a great space for writing and sharing online. I’m blogging, my students are blogging: we are co-bloggers.
Slide 19. Content Curation. Another thing I really like about blogs for content development is that they help you build content over time, post by post, and you can use the labels and search features of the blog to keep track of your editorial process, when you last used a piece of content in the blog, etc. etc. In my announcements, I am able to draw on a vast quantity of content that I have accumulated over the years; the blog helps me keep it all organized and ready for easy re-use.
Slide 20. Sharing and Syndication. By publishing content in a blog, I am able to connect and share with many people, not just my students. I’m also able to publish the content in one place and syndicate that content to other places: the announcements appear in my Canvas class spaces, it gets distributed by email, and people can also subscribe by RSS if they want. Students sometimes choose to remain on the class announcements blog email list, which always makes me happy, thinking about past students who might be out there reading the announcements too! If you are teaching in a K-12 environmentand communication with parents is important to you, this type of approach to the announcements might be very helpful, since parents could also sign up to get the announcements by email.
PART D. Key Tips.
Slide 21. Use IFRAME. To use your blog as a Homepage, you’ll need to embed it in a Canvas Page using iframe, and it will need to have an HTTPS address. If you just want to include your blog as a navigation item, you can use the Redirect Tool to embed the blog in Canvas. That works great to get your blog inside Canvas, but for a Homepage, you need the iframe. Details here. My iframe looks like this; don’t forget that the address must be HTTPS!
Slide 22. Be HTTP / HTTPS Aware. One potential problem you run into when you embed content in Canvas is that http links will not function. Your blog needs to be HTTPS, and so do the links in that blog. If the link is HTTP, then it must open in a new tab; otherwise, nothing will happen. Canvas will not open an HTTP link inside a Canvas page, but there will also be no error message; the link just won’t work. So, if there is any possibility that you will have HTTP links in your blog, you need to make sure that the links open in a new tab. I do that by having all links in the blog open in a new tab by including this in the <head> section of the blog; I’m sure there are other methods, but this is the easiest one for me:
<base target='_blank'/>
Slide 23. Include Navigation Links. This is a good rule for any kind of embedding: make sure you provide a link to the embedded object so that students can click on that link to access the content directly. That way, if anything goes wrong with the embedding, they can still access the content. You can also do your students a favor by letting them control the right-hand navigation panel. I configure my blog as the Front Page of the Pages area, and I make that Page the Homepage for the course. That means I can link to the Homepage URL (which displays the right-hand navigation panel) or I can link to the Front Page URL (which does not display the navigation). As a result, the students can toggle between the two views as they prefer. Details here.
And that’s all….!
Slide 24: Let’s connect! I’m eager to brainstorm any time. You can ping me at Twitter whree I’m@OnlineCrsLadyor leave a comment here, or we can connect at the Canvas Community.
In Fall of this year (my first semester using Canvas), and again this Spring, I did a mid-semester survey of my students that was focused specifically on Canvas. In the Fall I had hoped there would be some kind of survey of students about Canvas, but I was told no mid-semester survey was planned. I don’t know if there was any end-of-semester Canvas survey of students conducted; if there was, I never saw the results. Since I learned a lot from the Fall survey that was useful to me, I decided to do the survey again in the Spring for comparison purposes. You can see all the survey data here: Fall 2016 Spring 2017
Numbers
For the numeric ratings, the results were basically the same for both semesters. In comparison to D2L, the students on average rate Canvas “better” and about 1/3 of the students consider Canvas to be “far better” than D2L. Most of the students in my class are seniors so, like the faculty, they have years of experience with D2L, which means they are in a good position to compare the two systems.
I don’t use a lot of Canvas features, so the only features that I specifically asked students to rate were the Gradebook, Calendar, Messages, and Mobile App. In terms of the rating, the Gradebook is most highly rated (3.3 on a scale of 1 to 4), followed by the Calendar (2.8), then the Messages and Mobile App (both at 2.5).
Free Responses
As always, the most useful information is in the students’ free responses. I’d urge people just to read through the raw responses for Fall 2016 and Spring 2017 to get a sense of what they are like. I have a lot of thoughts about all of that, so to keep this blog post under control, I’ll just list 10 responses that come to mind.
1. Asking people to “give advice” on surveys is so productive! The most useful comments come from the two questions where I asked the students to give advice to instructors using Canvas and where I asked them to give advices to their fellow students. Unlike praise or complaints, advice is something actionable: when students give advice, they are oriented towards what people (instructors and students) can actually DO as we move to this new system so that we can make the best of it.
2. Students are driven by a focus on grades. Just speaking for myself, I consider the emphasis on grades to be a huge problem in education (details about my own un-grading here). Students are so focused on grades that they are not focused on their actual learning and how to become active, independent learners as they surely need to be. So, I’m not surprised that the Gradebook is the highest-rated Canvas feature, and if you read through the remarks in response to the question about what students like best about Canvas, it is comments about grades that predominate, as you can see in this word cloud from wordclouds.com. The fact that the LMS is largely an enrollment-and-grading tool is why I use the LMS very little in my own classes.
3. Email versus messages. There is a lot of dissatisfaction with Canvas messages, and some students said they would just prefer emails (like in D2L). Because of the extremely poor messaging inside the Canvas Gradebook compared to D2L, I send students a mix of Canvas messages and direct email, and I make sure to explain my approach to them. I don’t think students realize that we have no access to their email from inside Canvas (and I know there is faculty dissatisfaction with that also). It’s also clear that some students have either not configured the notifications at all or they find the configurations inadequate (getting too many messages by email or too few). I am very sympathetic to their wanting different settings for different classes, given that different instructors use Canvas in different ways.
4. Roster email. I was surprised to see how many students missed the roster email option; I had no idea students were even using that in D2L, and they have indeed noticed that it is not possible to email the whole class in Canvas. In my classes, I do Daily Announcements and I invite students to share announcements with me which I then include in the overall Announcements. I personally really don’t want students emailing the whole class with their own announcements, but I am very glad to publicize announcements for them as part of the regular class announcements.
5. Modules. Students clearly want course materials organized in modules, and they are frustrated if they have to navigate the Files, Assignments, or other areas to look for content that is not in a Module. There was also a good discussion of this topic at the Canvas Community recently: Faculty having a hard time with Modules (you can view that discussion without even logging in to the Community, which is great; to comment, you need to log in with your OU Canvas account).
6. Published… or not. A recurring student complaint is that faculty think they have published content when, in fact, they have not pressed the publish button. I’ve run into this problem myself; I think it would be a big help if Canvas made it much more obvious to faculty what materials have not been published yet, perhaps with some big banner across the top of each unpublished page. One student suggested that instructors use the Student View more so that they can realize for themselves where there are holes in the course as a result of unpublished materials. And, of course, experiencing the course as a student does is always a good idea; I personally really appreciate the way the Student View in Canvas is much more flexible than the D2L Student View was (you can actually complete assignments and view the Gradebook as a simulated student in Canvas).
7. Ready… or not. Students are also clearly frustrated when courses are not completely configured at the beginning of the semester. They want to be able to see all the content in advance and to use the grade calculator based on the whole semester. If faculty are adding and editing course materials as the semester goes along, students feel confused and/or frustrated.
8. Unused buttons. Several students remarked that instructors should disable course navigation buttons they are not using. Personally, I think it would be better to start out the default course spaces with only the homepage button enabled, and then let faculty ENABLE the buttons they are actually going to use since it is indeed unlikely that they are going to disable the buttons they are not using… although they certainly should do so!
9. Use the grace period. A couple of students recommended to instructors that they “use the grace period” which refers to the way that Canvas allows a soft deadline and a hard deadline for all assignments, which was not true in D2L. I’ve written about that elsewhere, and we had a good discussion about that just the other day in the Canvas Community: Grace Period.
10. Dashboard. Now that students are using Canvas for more classes, there were more remarks about the dashboard. I will write up a new Tech Tip to add to my collection (Canvas Tech Tips) to make sure students know what options they have for customizing the Dashboard. And I keep hoping the color overlay problem will be fixed soon (discouraging lack of updates here), because the Dashboard will be so much better when Canvas does not mess with our course card images. I like having the images, and I am eager to get rid of the overlay by next semester (fingers crossed…).
So, I’ll stop there, but I would encourage people to read the comments from my students or, even better, ask your own students what they think of how you are using Canvas. They might give you some great advice in return! 🙂
I wanted to write up some notes for a possible CanvasLIVE demo on working with YouTube Playlists, so I checked the Community to see who might have posted about this already, and I found a very useful post from Laura Joseph: Video killed my Canvas page. She discusses the power of playlists and also the very useful “start at” hack.
I also found this very useful page from Adam Williams: Embedding Content Using the Public Resources LTI. YouTube is indeed one of the resources you can embed that way, along with Vimeo, SchoolTube, Khan Academy, and Quizlet.
In this post, I’ll share my tips and tricks for working with YouTube playlists, starting with some examples of the kinds of playlists I use in my classes, and then some nitty-gritty how-to information about creating and maintaining playlists, and also about embedding videos and playlists in Canvas.
Why playlists? When you share videos in a playlist, it gives your students some learning context for what you are sharing, and it also gives them other videos to watch if/when they reach the end of the video that you are sharing. I try to only share videos in playlists; it doesn’t take any more time to share videos-in-playlists, and it really adds to the value!
SAMPLE PLAYLISTS
Spring 2017 Announcements: I include a video in the announcements each day, and that builds up to a big playlist by the end of the semester. It also means that each day’s video in the announcements is connected to all the other videos of the semester. I embed this playlist in the sidebar of the announcements blog.
Growth Mindset and HEART: These are student success / motivational videos that are connected to the growth mindset and Learning by H.E.A.R.T. activities in my classes. I embed these videos in the sidebars of the blogs for these activities: Growth Mindset blog and H.E.A.R.T. blog.
Indian Music: I really like sharing music from India with my Indian Epics class, so I keep a big Indian Music playlist, and I also have dedicated playlists for some of my favorite artists like Maati Baani and Manish Vyas. The same videos can appear in multiple playlists so it’s easy to have big playlists and also more specialized lists too. You can see the Indian Music playlist in the sidebar of my Indian Epics Comics blog.
Epified Videobooks: An amazing resource for my Indian Epics class is the Epified Channel’s videobooks based on Devdutt Pattanaik’s “Seven Secrets” series for Hindu Calendar Art, Vishnu, and the Goddess. You can see one of those playlists embedded here in my PAINT Canvas workshop: Calendar Art.
TIPS AND TRICKS
Creating a playlist. This is a tip I wrote up for my students. It covers how to create a playlist and add videos, and then how to share the playlist list and/or to embed the playlist in a blog. You can find lots more info at the YouTube Help page for Creating and Managing Playlists. You can even do collaborative playlists, although this is a feature I have not used myself. You can also build playlists that add new videos automatically, although again this is a feature I have not used myself.
Keeping playlists fresh. Some playlists you might want to keep fresh; that’s the case for my Indian Music playlist, for example. Other playlists might have static content that doesn’t change, like the Pattanaik videobooks. When you have a playlist that needs fresh content, you can add new videos… but you can also just recycle videos from the bottom of the playlist up to the top. To do that, hover over the time display for the video listing in the playlist, and then make it the thumbnail (if you want) and move it to the top of the playlist. When you do that, it refreshes the content of the playlist wherever it is embedded.
EMBEDDING IN CANVAS
And now, last but not least, embedding YouTube playlists and playlist videos in Canvas! First, you need to ask yourself if you want to embed a video-in-a-playlist or if you want to embed a playlist.
When you embed a video-in-a-playlist, the video will display, along with controls that allow students to move backwards or forwards in the playlist. By default, when the current video finishes, the display will move on to the next video in the playlist.
When you embed a playlist, the top video in the playlist will be the video that plays. This means the content is dynamic; when you change the top video in the playlist, that will change the playlist display wherever you have the playlist embedded.
To embed a VIDEO, just click on the Share button you see underneath the video, and select Embed. You will see that you have some options to configure, including the size! See the iframe code in the box? That is what you will copy-and-paste into Canvas.
To embed a PLAYLIST, go to the Playlist page, click on the Share button there, and then Embed, and you will see the same type of dialogue box as for a video share. Just like with the videos, you can configure the playlist width and other options.
So, once you have got the iframe code, you can paste that into the HTML Editor view of a Canvas page. If you want to center the video, just type VIDEO or something like that, center it, and then you will know exactly where to paste the iframe code when you are looking at the HTML Editor view:
Beware the Canvas-Bot. Be warned: Canvas will offer to convert a YouTube link into an embedded video for you, but the results are pretty poor, as you can see from this comparison page: YouTube Playlists in Canvas. It’s easy to learn how to configure your own YouTube embedding and do that yourself instead of letting the Canvas-Bot do that for you. 🙂
So, that’s an overview of how I am using the amazing power of YouTube playlists in my classes. What about you? Share your stories, questions, and suggestions in the comments! 🙂
In my Twitter4Canvas workshopand in the CanvasLIVE Twitter Widget demo, I’ve mostly kept the focus on the what-and-how: what are Twitter widgets and how do you use them in Canvas? There are so many possible ways to use Twitter, and these instructions will hold true for any possible use of Twitter. My use of Twitter is very much about connected learning, so that’s what I want to write about in this blog post.
Here are the ways I think about Twitter as a space for connected learning:
CONNECTING WITH STUDENTS. I use a class Twitter account to connect with my students, sharing things that I find at Twitter which I think can be useful and/or fun for them. Because I teach fully online classes, I need to find online ways to connect with my students, and Twitter is one of those ways. Every time they come to Canvas or visit one of our class web spaces (the UnTextbook, our class wiki, etc.), they are likely to see a Twitter stream in the sidebar. Sometimes what they see in the Twitter stream will be related to the content of the class, but often it is something extra: university announcements, campus events, etc. As I work with the students and get to know them, I try to find Twitter items that will appeal to them, as well as sharing Twitter items that help them learn about my own interests. When I find a Twitter item that I am sure will be of interest to a particular student, I send them an email with a link to the Twitter item: that’s one of the best connections of all!
CONNECTING WITH THE WORLD. Both of the classes I teach have a big reach: World Folklore and Mythology (so, yep, that’s potentially the whole world!) and Epics of Ancient India (but I certainly don’t limit it to ancient India; the modern relevance of the epics is a key theme in the class). By using Twitter, I can connect my students to people in other countries, showing the living presence of the class content in people’s lives today. For the Myth-Folklore class, one of the best ways to connect is with the #FolkloreThursday hashtag (it is seriously amazing, week after week), and in the Indian Epics class, I am so excited to connect with authors that we read in the class, especially Devdutt Pattanaik, a personal hero of mine. I can also connect the students with Indian musicians, like Maati Baani, who are doing beautiful fusion folk music; check out their latest video here, honoring the farmers of India: Saccha Mitra (True Friend).
I just shared this w/ student in my India class so I wanted to share it again here! @maatibaani salutes the farmers: https://t.co/YRI4ShCLIm
INTERNET CONNECTEDNESS. The strength of the Internet comes from linkiness, the way one thing on the Internet is connected to another and another and another. Even better are embedded links where the browser goes and fetches the linked content and displays it for you, as it does with images and videos. That’s why I prefer real Twitter widgets to the Canvas Twitter app which displays no images or video. The media displays for both images and video in Twitter are really good, even in the tiny widget version. As a general rule, I only reshare that type of “connected” content at Twitter: tweets with images or video, or tweets with links… including the hashtag links that are one of Twitter’s greatest strengths.
HASHTAG CONNECTIONS. Whoever invented the hashtag is an Internet genius in my opinion. The hashtag allows people to connect and find each other in the vastness of Twitter based on shared interests, like the #FolkloreThursday example that I shared above, and as in the phenomenon of Twitter chats, which teachers use so well (like in Oklahoma’s own long-running #OklaEd chat every Sunday evening).
CONNECTING A CLASS NETWORK. Some people also use Twitter as a way for students to connect with other students, which is a great idea in my opinion! In my classes, the students are connecting with each other through their blog network, but if I were not teaching writing (blogs are great for writing), I would definitely consider using Twitter as a platform for building a class network. If anybody reading this blog post uses Twitter for class networking, share your story in the comments!
TWITTER AS PLN. Although my primary use of Twitter is to find and share content with my classes, I also use Twitter as a personal learning network, especially for connecting with other people at my school (I live in NC but I teach “in” Oklahoma, and Twitter is a big part of how I stay informed about what’s happening on the Norman campus). So, to close out this post, I will share this fun infographic from Sylvia Duckworth about connected educators on Twitter: