CanvasLIVE Freebookapalooza

Here’s my Freebookapalooza slideshow, with the video from the June 15 event. There are lots of links in the notes below because I was not sure if I would be able to do the event or not; I had my wisdom teeth out that morning!

Slide 1: Opening.
Slide 2: Title Slide.
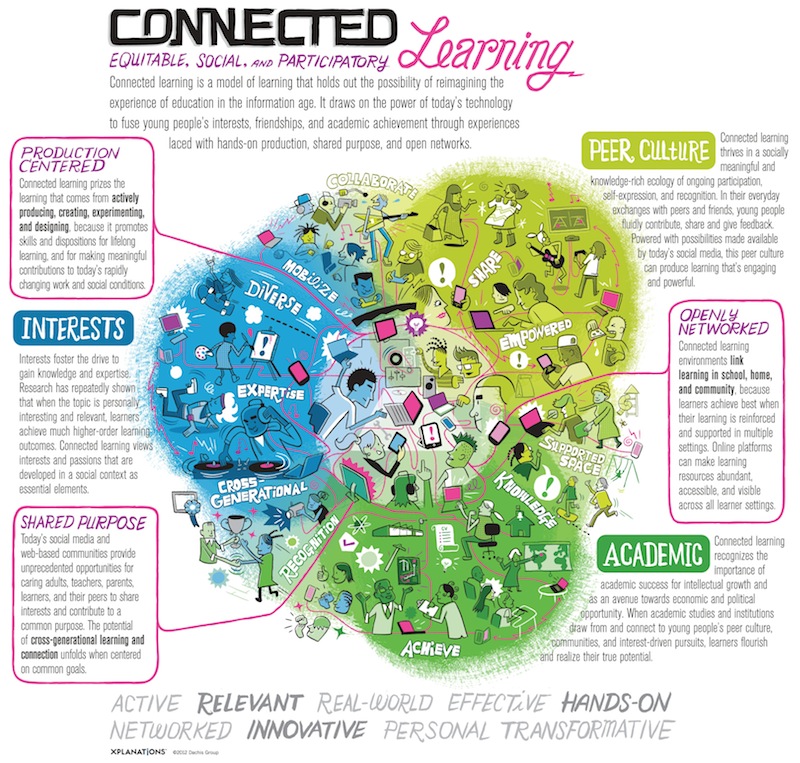
Slide 3: Connected Learning… with Cats.
Slide 4: Taming the Web: The Power of Curation. This is part of my “Summer of Curation” series; check out YouTube Playlists from last time, and coming up next is Beautiful Curation with Pinterest and Flickr.

Slide 5: Dimensions of Curation. This is a slide from last time to remind people about the different dimensions of curation. I really emphasize all of these except for tracking; I get anecdotal feedback from my students, but I don’t really do a lot of analytics (although with Blogger, I could).

Slide 6: Bookmarking Tool: Diigo. Having a bookmarking tool is the key to good curation. I use Delicious for many years, then it went belly up, and I switched to Diigo. It took me a while to appreciate Diigo, but now I love it! See this post for details: My Favorite Features about Diigo and Canvas.

Slide 7: Freebookapalooza at Diigo. The Diigo tags let you browse the Freebookapalooza in lots of ways. Blogs are great for presentation, but the Boolean searches you can do with Diigo bookmark tags make it useful in a different way than the blog.

Slide 8: Publishing Tool: Blogger. I’ve used Blogger for years and since my favorite feature of blogs is navigation-by-labels, Blogger works great for me. Blogger’s native label widgets are actually more powerful and easier to configure than WordPress (although of course you can get WordPress plugins and do programming that go far beyond Blogger labels). Another reason I like Blogger is that it is the choice of most of my students, and I like using the same tools that my students use. More about blogs and labels here: Blog Labels: When you want students to explore…

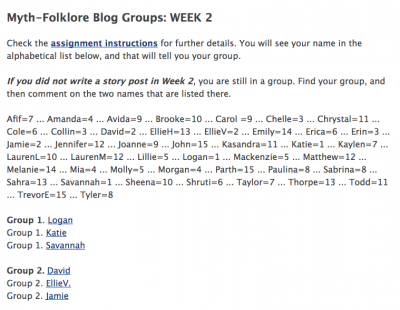
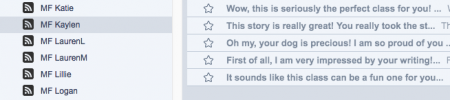
Slide 9: Freebookapalooza Blog. I hope you will take a few minutes to just browse the Freebookapalooza and see how it works. Maybe you will find some books that you like! There are almost 1000 books here chosen for my Myth-Folklore and Indian Epics classes, giving the students a huge library of full-text books online to browse and use.

Slide 10: Online Books and Other OER. This approach works for ANY kind of online educational material you want to collect and share. For example, if there are Wikipedia articles that you know are useful to your students, bookmark them, organize them, and share them back out with your students. You can do that in ways that will be far more engaging than just a list of links, and more productive than just having your students wander Wikipedia without your guidance to get them started.

Slide 11: Bookmarks to Blog & Back to Bookmarks. For the process of moving from Diigo to Blogger and then back to Diigo again, see this blog post: Freebookapalooza: A Web-Based Curation Adventure. Both Diigo and Blogger have powerful features, and I like to exploit them both!

Slide 12: Step 1: Bookmark every possible item. Even though I ended up with almost 1000 books in the Freebookapalooza, I still have hundreds of items that I have not cataloged yet, patiently waiting in my Diigo bookmarks until I have time to add them.

Slide 13: Step 2: Annotate and publish the best items. For details about the blog post scheme I used, see this post: Web-Based CurationThe most important decision I made was to include the table of contents. That sometimes took a little time if I had to transcribe it myself (or correct really poor OCR), but it was worth it because the students can really see what’s in each book, and it dramatically increases the power of searching at the blog.

Slide 14: Step 3: Delete old bookmark, save new. One of the things I like best about bookmarks and labels is that you can use it to manage your workflow!

Slide 15: Libraries that Scale: S, M, L, XL, XXL, XXXL. When I started the Freebookapalooza, my goal was to have around 100 books so I could share a new book in the daily announcements each day… but it grew and grew and GREW. And it would be even bigger if I had had more time. So, I can testify that this approach works at any scale, and it allows you to grow from something small to something big. Really big.

Slide 16: Flexible Architecture: Labels. The labels are the key: by letting the blog post labels be the navigation architecture at your blog, you don’t have to do anything except label each new post carefully, and then create the label widgets you want to use in your sidebar. More here: Blog Labels. The flexible architecture of blogs is the key difference with Canvas content: there is no content architecture in Canvas besides the inflexible previous-next system you assign via the modules. The actual Pages and Files area are a mess, even at a small scale. At large scale, they are impossible. On that, see the very informative and heartfelt comments from Canvas users who want folders for their Pages.

Slide 17: Same Content: Different Labels. Even better, labels let you design different ways to navigate the content, based on your users’ different needs. In my new Aesop’s Books project this summer, for example, I love the way I can make instant “book galleries” (showing all the fables in a book) and “fable galleries” (showing all the different versions of the same fable) simply by making sure i have a book label and a fable label for each post. I just label; Blogger does all the navigation and page-building for me, automatically.

Slide 18: Feeding Canvas: Randomizing Widgets. I’ve done a whole CanvasLIVE all about the power of randomizing widgets in Canvas.

Slide 19: Feeding Canvas: Blogs via RSS. I found a great new way to display blog content with the Redirect Tool in Canvas. Details here: Blog Labels + Inoreader + Redirect Tool = Canvas Magic!

Slide 20: Feeding Canvas: Diigo via RSS. I’ve written a whole post about Diigo and Canvas here: My Favorite Features about Diigo and Canvas.

Slide 21: Presentation Recap.
Slide 22: Let’s Connect.
Slide 23: Close.

Blog-as-Homepage CanvasLIVE Slides

Here’s the Blog-as-Homepage Slidedeck for the upcoming CanvasLIVE, with notes and links below. After the CanvasLIVE event on April 6, I’ll add the YouTube video here too.

And here’s the video 🙂

Slide 1: CanvasLIVE opening slide.

Slide 2: Blog-as-Homepage title slide.

Slide 3: Connected Learning with Cats slide. This is the second in a series of Connected Learning with Cats demos for CanvasLIVE. Check out #CLCats at the Community, and you can find more information at the Connected Learning Cats posts here at my blog.

Slide 4More Canvas Projects. This slide provides links to some other Canvas projects I am working on. You can find all of those links here on the About Me page which I’ve put inside the Canvas: Growth Mindset course, my newest project!

PART A. Blog Tour. I’ll start off by showing you around the blog that I use for my class announcements.

Slide 5. Announcements as Exploration. I see announcements as a way to get important information to students, but also as a way to encourage them to explore, learning things to satisfy their curiosity and grow as learners. It’s not about “class content” in the sense that everybody in the class needs to read it and learn it. Instead, it’s more open-ended, trying to find ways to connect to the students one by one, across that wide range of individual interests. So, even if blog-based smorgasbord announcements aren’t a good fit for your class, you might still get some ideas here about open-ended, wide-ranging content “extras” that you can include in your classes.

Slide 6. Examples of Blog-as-Homepage. You can see how I do this in my two classes: Myth.MythFolklore.net and India.MythFolklore.net. How you might choose to organize your announcements blog would totally depend on your class, your students, their needs. My announcements blog has evolved over the past 10+ years, so I can assure you that it is a strategy that works for me. I was really glad to learn how to embed my announcements blog in Canvas just as I did for many years in D2L (the LMS we used for 10 years prior to Canvas at my school). I cannot answer people’s questions about the standard ways of doing announcements in Canvas because when we moved this year from D2L to Canvas, I just carried on with my embedded blog, just as I had done in D2L.

Slide 7. Class Business Section. There’s always a paragraph at the top with a reference to the day and week (there are new announcements every day, including Saturday and Sunday). I put the most important information that people might need in that top paragraph. Below that is a section called “Class Procedures and Reminders” which I try to keep to at most three items per day. These are paragraphs specifically related to class activities, especially any assignments that are due. I don’t have any images here, just text and links.

Slide 8. Fun Section. The rest of the body of the blog post contains stuff that is for fun and exploration. Each item has some kind of image or video that goes with it, and I’ll say more about that in the next part of this presentation.

Slide 9. More Fun in the Sidebar. The sidebar contains more fun stuff, all of which is dynamically generated. The sidebar is not something I have to edit; instead, the content creates itself. There are javascript randomizers from my Canvas Widget Warehouse, and I also have a Twitter stream there (find out more at Twitter4Canvas). More about the sidebar here: The Sidebar Never Sleeps.

Slide 10. What about Mobile? I use Blogger which has great support for mobile. It automatically detects when the browser is being used over mobile, and it defaults to a mobile view, suppressing the sidebar. You can simulate Blogger mobile view by adding ?m=1 to any Blogger blog or blog post address just to see what that looks like. That way I can be sure that the blog is useful to students whether they are watching it in the mobile view or in the laptop view with the sidebar. (My students mostly use laptops for their classwork since both classes are writing-intensive, but I know they use Canvas to check in on the calendar and announcements using their phones.)

Slide 11. Every Day Announcements. Blogging really lends itself to an “every day” approach, and that’s the approach I take with announcements. It’s also my philosophy of education in general, where I try to encourage my students to learn a little bit every day as opposed to the binge-and-purge learning that is so common, especially in higher education where classes don’t even meet every day. I don’t expect my students will actually read the announcements every day, but if they do, I have something to offer them!

PART B. Examples of Fun StuffI’ll show some examples here of the kinds of fun stuff I share with my students, focusing on the content that I’m also sharing through my Canvas Widget Warehouse, which means the content is all shared with you as well, ready to be deployed in your Canvas course Pages if you want.

Slide 12. Growth Mindset Cats. These are so popular with the students that I include them both in the sidebar and in the daily posts. You can find out more here: Growth Mindset Cats Widget. I’ll be doing a presentation on the Growth Mindset Cats for CanvasLIVE on April 20.

Slide 13. Free Books. I have a huge Library of Free Online Books for my students, and it is one of the main ways I hope to inspire them to keep on reading and learning after the class is over. You can find out more about the Freebookapalooza here. I’ll be doing a Freebookapalooza presentation for CanvasLIVE on June 15.

Slide 14. Student Projects. I love featuring student work in the daily announcements, both in the post and in the sidebar. Students can get ideas and inspiration from seeing other students’ work, and it also shows them that their work is important too, something that will live on in future classes. You can find out more about my Student Project Archive here.

Slide 15. Motivation. I’m a big believer in motivational graphics along with inspirational proverbs and memes.  I’ve got lots of different collections of graphics and memes which you can explore at the Widget Warehouse.

Slide 16. Videos. I really like including videos, and you can read more about my approach to YouTube videos and playlists here. I’ll be talking about YouTube Playlists at a CanvasLIVE on June 1.

Slide 17. Ask Your Students. Especially as you are developing the content to use in your announcements, ask your students! My students can choose an extra credit option each week to tell me what their favorite item was from the announcements (which is also a good way to get them to go back and review the announcements!), and that way I learn which kinds of content they are really connecting with. As a general rule, asking your students is pretty much the best way to improve your classes IMO.

PART C. Advantages of BloggingThese are the advantages of blogging, both for class announcements and also as a general practice.

Slide 18. Blogging and Co-Blogging. My classes consist of student blog networks, and so it is very important to me that I show the students how blogs can be a great space for writing and sharing online. I’m blogging, my students are blogging: we are co-bloggers.

Slide 19. Content Curation. Another thing I really like about blogs for content development is that they help you build content over time, post by post, and you can use the labels and search features of the blog to keep track of your editorial process, when you last used a piece of content in the blog, etc. etc. In my announcements, I am able to draw on a vast quantity of content that I have accumulated over the years; the blog helps me keep it all organized and ready for easy re-use.

Slide 20. Sharing and Syndication. By publishing content in a blog, I am able to connect and share with many people, not just my students. I’m also able to publish the content in one place and syndicate that content to other places: the announcements appear in my Canvas class spaces, it gets distributed by email, and people can also subscribe by RSS if they want. Students sometimes choose to remain on the class announcements blog email list, which always makes me happy, thinking about past students who might be out there reading the announcements too! If you are teaching in a K-12 environment and communication with parents is important to you, this type of approach to the announcements might be very helpful, since parents could also sign up to get the announcements by email.

PART D. Key Tips.

Slide 21. Use IFRAME. To use your blog as a Homepage, you’ll need to embed it in a Canvas Page using iframe, and it will need to have an HTTPS address. If you just want to include your blog as a navigation item, you can use the Redirect Tool to embed the blog in Canvas. That works great to get your blog inside Canvas, but for a Homepage, you need the iframe. Details here. My iframe looks like this; don’t forget that the address must be HTTPS!

<p><iframe src="https://ouclassannouncements.blogspot.com/" width="100%" height="1000"></iframe></p>

Slide 22. Be HTTP / HTTPS Aware. One potential problem you run into when you embed content in Canvas is that http links will not function. Your blog needs to be HTTPS, and so do the links in that blog. If the link is HTTP, then it must open in a new tab; otherwise, nothing will happen. Canvas will not open an HTTP link inside a Canvas page, but there will also be no error message; the link just won’t work. So, if there is any possibility that you will have HTTP links in your blog, you need to make sure that the links open in a new tab. I do that by having all links in the blog open in a new tab by including this in the <head> section of the blog; I’m sure there are other methods, but this is the easiest one for me:

<base target='_blank'/>

Slide 23. Include Navigation Links. This is a good rule for any kind of embedding: make sure you provide a link to the embedded object so that students can click on that link to access the content directly. That way, if anything goes wrong with the embedding, they can still access the content. You can also do your students a favor by letting them control the right-hand navigation panel. I configure my blog as the Front Page of the Pages area, and I make that Page the Homepage for the course. That means I can link to the Homepage URL (which displays the right-hand navigation panel) or I can link to the Front Page URL (which does not display the navigation). As a result, the students can toggle between the two views as they prefer. Details here.

And that’s all….!

Slide 24: Let’s connect!
I’m eager to brainstorm any time. You can ping me at Twitter whree I’m @OnlineCrsLady or leave a comment here, or we can connect at the Canvas Community.

Slide 25: CanvasLIVE closing slide.

The Sidebar Never Sleeps: Live Content 24/7

I teach General Education courses in the Humanities, and that means I welcome any opportunity to share with my students the wealth of literature, art, and music that is online. I can never be sure just what will click with each student, so I’m try to expose them to a steady stream of ever-changing items. Ideally, they might see something that makes them want to click and learn more, but even if that does not happen, by the constant parade of content, I am showing them what a world of culture they can find online … if they go looking.

The main way I do this is with my Class Announcements blog: every day there are new announcements, and then in the sidebar of the blog things are ever-changing, not just day to day but every time the page reloads. My goal is that every time they log on to Canvas, they will see something new… automatically. I’m busy doing other things (commenting on their projects), but while I am working, the power of the dynamic content in the blog is working too!

I’ve written elsewhere about how I configure Canvas so make my blog the homepage, and in this post, I want to provide a quick tour of my sidebar. If you go to my class Myth.MythFolklore.net (fully open, just click and go!), you can follow along by looking at the sidebar there for yourself; there is information about each sidebar item below.

Text Box: On top is a text box which is static and does not change; it contains the single most important link for students who are in a rush to get to what they need for class: the Class Calendar. While I want the blog to be a fun, exploratory space, I also want students in a hurry to be able to find what they need to get to work on the class.

Email Subscription: Some students subscribe to the announcements by email, which I think is great. Blogger’s Feedburner service provides really nice email presentation of the blog, so I am glad when students do choose to get the announcements by email. I’m subscribed too, so I can see the same email the students receive.

Random Cats: This is a randomizing widget of Growth Mindset Cats; the cats have turned out to be incredibly helpful in promoting a spirit of learning and also fun in my classes. If you’re interested, you can snag this widget and use it too, either in a blog like this or directly in a Canvas page: Widget Warehouse: Growth Mindset Cats.

Class Twitter: I try to update the class Twitter at least twice a day; it only takes a few minutes to add new items (I just retweet), and it’s always fun for me to see what’s new. Here’s how that works: Twitter for Class Content: My Top 5 Strategies.

Reading, Writing, Learning. This is a combination widget that randomly draws on several different widgets: Writing Inspiration, Reading Inspiration, and H.E.A.R.T. (each of those links goes to the Widget Warehouse page; these are also available for anyone else to use). Thanks to the power of random, new things appear each time the page loads!

Random Storybook. These are student projects from my class archives. I really like reminding students all the time how the projects they create will become part of future classes too. Their work matters! You can see the archive here: eStorybook Central.

Free Books Online. This is my favorite widget: it displays free books of stories and legends (I teach Mythology-Folklore and Indian Epics), drawing on the 900+ free books in my Freebookapalooza Library. I’ve broken that widget down by region, too, hoping that might make it more useful for others if you might also want to share free books with your students: Widget Warehouse: Freebookapalooza.

Videos. This is the playlist that I create with the videos from past class announcements; every day there is a new video in the daily announcements, and this playlist gives the students access to all the videos so far this semester. It’s like a second chance in case the students didn’t notice the video in yesterday’s announcement. You can see the playlist directly with this link: Announcements Videos.

RSS Links. I’ve never been able to get my students excited about RSS (alas!), but I do include the RSS links here in my sidebar.

Suggestion Box. Finally, there is a link to a Google Form where students can provide anonymous suggestions. Since there are lots of other opportunities for feedback in the class via their blogs, the students rarely use this, but I want to make sure they know that anonymous feedback is also welcome!

Every semester I tinker with the sidebar, and it’s hard to restrain myself from putting even more in there. I’m happy with the selection that I have now… but when I get some time to make more widgets this summer, I’ll probably be redecorating the sidebar for classes this Fall.


Crossposted at Canvas Community: Instructional Designers.

More on Embedded Blogs (or Sites)

Keegan just shared a great post about embedding a website in Canvas via the Redirect Tool: How To Integrate Websites Into Canvas. Lots of helpful information and screenshots also! If the goal is to have students actually stay in Canvas, using the Redirect Tool to add the site address to the course navigation definitely works. That is the method Keegan documents there in his post.

If, however, you want to use the embedded site as your Home Page, then you need a different option: the iframe tag is a way that you can insert a website into a Canvas Page. You can then make that Page the Home Page of your course. That’s the main difference between these two methods of embedding — unless there is some way to make a Redirect item into a Home Page??? If there is, I have not figured that out.

Here’s how the Blog-as-Home-Page works for me:

Whenever a student arrives at my Canvas course, the first thing they see is the announcements: Myth.MythFolklore.net (course is fully public, so you too can just click and go). Here’s a screenshot:

You’ll notice I also have a note up there at the top, alerting people that they can just pop open the embedded site in a tab of its own if they want.

So, if students are just on their way to the Gradebook, at least they will see the top part of the announcements (which is where I put the key information each day). If they are going to read through the whole announcements page, though, they will have a better time doing that outside the Canvas straitjacket, which is why I encourage them to open the blog in a new tab.

For details on how to embed a blog this way and also configure it to be the Home Page, see this post: Blissfully Blogging Announcements.

IMPORTANT: http links. Also, if you do embed a website, either with iframe or with the Redirect app, it is really important that you make sure the links open in a new tab. Canvas will not open http links inside Canvas; you have to open http links in a new tab. Worse: there is no warning or error message from Canvas if you click on an embedded http link. Just… nothing. You click and click and nothing happens. A student might figure out that they need to right-mouse-click to open in a new tab, but I wouldn’t count on it. They are just as likely to assume the link is broken.

So, given that there are still plenty of http links out there in the world — including all OUCreate sites that have not turned on encryption — I’ve found it easiest just to set up the site to open all links in a new tab automatically. I use the <base target=’_blank’/> tag in my blog template header, but I am guessing there are other good ways to do that too (more details).

Are there any other tips and suggestions from people who are using the Redirect app or iframe to bring external content into Canvas? Share your ideas in the comments here or at Keegan’s post. Or you can find us both at Twitter: @OnlineCrsLady and @KeeganSLW.

Break through the barriers!

Crossposted at OU Canvas Community.

Blissfully Blogging Announcements in Canvas

I’m making good progress on the Twitter4Canvas materials (I may have a complete rough draft of it all this weekend!), and what I wanted to do today was show how I share Twitter in my Canvas classes via the Blogger blog I use for my class announcements. I wrote about this last year, and I’m now updating that post with a focus on Twitter and Canvas.

This post has three parts: description of the blog that I use as my homepage, advantages of using a blog for the homepage, and then some nitty-gritty about how I embed the blog inside Canvas.

But first, a screenshot: here’s what my Canvas homepage looks like. You can see the latest version by visiting Myth.MythFolklore.net or India.Mythfolklore.net; both courses are open, and both show the same blog as the homepage. You can also visit the Announcements blog directly, separate from Canvas. Scroll on down to see the whole thing. 🙂


DESCRIPTION. The blog has basically four components:

Top Paragraph. There’s always a paragraph at the top with a reference to the day and week (there are new announcements every day, including Saturday and Sunday). I put the most important information that people might need in that top paragraph.

Procedures Section. Below that is a section called “Class Procedures and Reminders” which I try to keep to at most three items per day. These are paragraphs specifically related to class activities, especially any assignments that are due. I don’t have any images here, just text and links.

Fun Section. The rest of the body of the blog post contains stuff that is for fun and exploration. Each item has some kind of image or video that goes with it. There are three items at the top that are about reading, writing, creativity or just something for fun; then a featured student project (Storybook) from a previous class; next is a free book online related to the class; a proverb poster; a video of some kind; a Growth Mindset Cat; an event taking place on campus that day; and, finally, an “on this day” event at the bottom.

Sidebar. The sidebar contains the key class link at the top of the page, an email subscription form, a random Growth Mindset Cat, the class Twitter feed, a random graphic, a random Storybook, a random free book online, a video playlist of all the announcement videos, plus an anonymous suggestion box.

ADVANTAGES. Here are the top 5 reasons why I prefer to use a blog for my homepage:

1. I model blogging. My classes consist of student blog networks, and so it is very important to me that I show the students how blogs can be a great space for writing and sharing online. In all my blogs, I try to use good strategies that my students can likewise use in their own blogs.

2. Blogs have sidebars. It drives me crazy that Canvas gives me no opportunity to develop the sidebar for my class in useful ways. There is nothing I can do with that Canvas sidebar. I cannot add dynamic widgets, I cannot add graphics. I cannot even add links to it: if you add a non-Canvas link to the sidebar students are “warned” before clicking on it, which means Canvas doesn’t even trust me to add links to my own sidebar! I need a sidebar that is going to be display cool, useful, new content every time the students log on. The blog gives me that sidebar design space.

3. The blog makes Twitter and javascripts easy. Of course, it is also possible to build a Twitter widget, which is what I will be demonstrating in the Twitter4Canvas course, but that requires an extra step, sneaking Twitter into Canvas by way of a separate https webpage. By embedding the blog into Canvas, I can use Twitter and other javascripts without going through that extra step. The javascript runs at the Blogger server, which means that Canvas is not running the javascript; it is just displaying the results. The Canvas security police are okay with that.

4. Blogs offer mobile view without an app. I often include links to the daily announcements in communication with students, and those links are mobile-responsive automatically; if students are checking their email on their phone, for example, they will see the mobile view when they click on the announcements link, automatically, no app required.

5. One blog for two classes. Since I use the same announcements, I need to be able to edit once and display twice. If I did the announcements using the LMS tool inside the course space, I would have to edit the announcements twice. Not good. I also like that the blog has continuity. Canvas doesn’t understand that I am teaching the same classes every semester, but Blogger does; I’ve been using this exact same Blogger blog for my classes since 2008… which means I am coming up on my ten-year blogiversary.

NITTY-GRITTY. Here is a detailed step-by-step of the options I use to configure my blog inside Canvas.

Canvas URLs. The key thing to understand is that I am using a wiki page AND I am telling Canvas to make my wiki page the default homepage of the course, so both of those addresses show my blog:
https://canvas.ou.edu/courses/31878
https://canvas.ou.edu/courses/31878/wiki
That 5-digit number refers to a specific semester course instance; it changes from semester to semester, course to course. So, make sure you notice the difference: the course homepage has the right-hand sidebar, but the wiki front page does not have the right sidebar (but it does have the very annoying “view all pages” across the top which Canvas will not let me suppress). That difference will be important in the set-up described below.

Okay, here goes:

Blogger. I use Blogger because, until recently, that was the best option I could recommend to my students. Blogger is ad-free and it is javascript-friendly, while the free hosted version of WordPress has ads and does not like javascripts. Now my students can use DoOO (Create.ou.edu) and set up their own WordPress but I’ve had students blogging for years… and I couldn’t wait for DoOO. Most of my students use Blogger too, although some use WordPress, which is great. I provide detailed tech support for Blogger since I know it best.

HTTPS. Blogger now has https. By default, it displays http, but you can use https too. That’s what you need to display the blog in Canvas. All the sidebar content also needs to be https to display in Canvas.

Blogger templates. All the standard templates (but NOT the “dynamic view” template) would work; I use the “Simple” template, and I set the blog width at 840 pixels and the sidebar width at 260 pixels. I put the page font at 15 pixels Arial with post titles at 18 pixels. I suppress the top navigation bar (the one with the search box).

Open links in new tabs. Because the mixed-content rules in Canvas mean http links will fail unless they open in a new tab, I edited my template’s HTML to open all links in new tabs automatically. To do that, just add this big of code right after the <head> tag so it looks like this:

<head>
<base target='_blank'/>

Canvas “Daily Announcements” page. I start by creating a Page in the course wiki; I called it “Daily Announcements.” Then I made that the “front page” of the wiki:
https://canvas.ou.edu/courses/31878/wiki
I then chose that as the “Home Page” for my Canvas course:
https://canvas.ou.edu/courses/31878
But, as noted above, the “Home Page” for the course shows the right sidebar but the “Front Page” of the wiki does not; that’s just an automatic Canvas thing beyond your control.

Blogger in wiki page. I use a simple iframe to put the Blogger into the wiki, making sure I use the https address of the blog; I set the width at 100%, and I have a height of 1000 (my blog posts are usually longer than that, so there’s a scroll bar in the frame).

<p><iframe src="https://ouclassannouncements.blogspot.com/" width="100%" height="1000"></iframe></p>

Then I do something tricky. Remember how the course homepage has the right sidebar and the course wiki front page does not? Well, for many reasons, I prefer to have a homepage without the right sidebar. So here’s what I do:

Create Homepage link in left sidebar. I use the Redirect Tool to create a “Homepage” link which I display in the left sidebar (how ridiculous is that… having to install an app just to add a link to class navigation? whatever…). That link goes to the wiki front page address (which means the right-hand sidebar does not appear):
https://canvas.ou.edu/courses/31878/wiki

Remove “Home” from left sidebar. After I create my Homepage link in the sidebar, I then remove the Canvas Home link from the left sidebar, putting the Homepage link I made with the Redirect tool up at the top.

Fix up “Daily Announcements” page. Above the embedded blog, I add some text to help people navigation: I want students to realize they can turn the right sidebar on or off, and I also want to tell them how to suppress the left sidebar. Most of all, I just wish they would open the announcements in a new tab entirely!

* Hide or show the right menu.
To do that I use these addresses to make the links:
hidehttps://canvas.ou.edu/courses/31878/wiki
    showhttps://canvas.ou.edu/courses/31878
* Reminder about how to suppress the left menu.
* A link to open the Announcements in a new tab.\

And that’s it! I think those are all my tricks, but if I forgot something, please ask. I really am a big fan of this approach, and I am glad to help if anyone wants to give it a try. 🙂

Do not go where the path may lead;
go instead where there is no path,
and leave a trail.

(Growth Mindset Cat)

Crossposted at OU Canvas Community.

Keep Calm and Love the Randomness

I said I’d explain how I set up the responding groups in my class at random, so I documented the process step by step today. I have really worked on this system over the years because it’s a very important part of the class. Finding ways to make sure that people meet each other and that they both give and receive comments reliably is important to me.

Plus, I also don’t want to spend a lot of time on this; using a randomizing spreadsheet means that the whole thing takes me under 15 minutes, but the students have exactly what they need to quickly find the blogs they need to comment on without having to look things up: just click and go! And the use of labels in the blog sidebars means that the blogs are all very easy to navigate.

And no, there is very little about Canvas in here. Why? Because Canvas doesn’t let me manage a spreadsheet with my students’ data along with other data. So, what you will read about here is how I create a spreadsheet in Google Sheets, in other words: a real spreadsheet, with randomizing functions, sorting, filtering, etc. Which means: nothing like the horrible Canvas gradebook which I cannot even filter. I copy the one piece of data I need from Canvas into this spreadsheet, as you’ll read below.

Here’s how it works:

1. Update instructions. Each week, I update the instructions from last semester; for this semester’s Week 2, they just needed a bit of tinkering because of the new “story planning” option: Week 2 Instructions. That page links to the groups for each class; now I need to create the groups!

2. Find inactive blogs (no story). I check to see who did NOT write a story this week. To do that, I use Canvas, looking for blank Week 2 Story Declarations. I also double-check to make sure they didn’t just forget to do the Declaration (if that’s the case, I fill it in for them). In a given week, there are usually a few people in each class who don’t do a story, which is fine. This time I had 3 people without stories in each class. That lets me do a quick calculation about how this will work in Groups of 3. In both classes, I have 2 left over when I divide by three, which is awkward, so the best way to smooth that out is to create 4 groups of 2, and then have the rest be groups of 3. That gives me 15 Groups in Myth-Folklore (41 active students, 3 inactive), and 13 Groups in Indian Epics (35 active students, 3 inactive) this week.

3. Spreadsheet! Then I go to the magic randomizing spreadsheet which I set up in the first week of class as students created their blogs. I have the raw HTML arranged in columns, including an “inactive” column for people without a story this week. So, I move the blogs without a story from the active column into the skip column. That gave me 41 active people with stories in Myth-Folklore, and 35 in Indian Epics.

4. Randomize! I then randomize the spreadsheet using the amazing RAND function. So, I paste in the RAND for all the active blogs and then sort on the random column. Presto. That gives me the inactive blogs at the bottom (because their cells are blank), and all the other blogs randomized. I then paste in a column of group labels that I reuse from another sheet (Group 1, Group 1, Group 1, Group 2, Group 2, Group 2 and so on). I jiggle the bottom four groups so that they have two people plus one inactive (or blank), and that’s it.

5. Group listing and alphabetical listing. I sort by groups to get a group listing and paste the HTML into the wiki page. Then, I sort the spreadsheet alphabetically by people’s names, which gives me an alphabetical listing so people can find their group number. And that’s all! You can see what the weekly listing looks like here: Week 2 Myth-Folklore. The alphabetical listing comes first, and then the groups below. The idea is to make it very quick for students to get to the blogs in their groups.


So, yes, I wish the Canvas Gradebook were like a real spreadsheet. But it is nothing close to being a spreadsheet; I will save those complaints for another day. Today I will just say that I love the power of Google Sheets and the RAND function. 🙂

(Made with keepcalmomatic)

Crossposted at OU Canvas Community.

Inoreader and Tracking Blog Comments

I was going to post about Twitter4Canvas today, and I might still have time to do that, but I wanted to write up something today about Inoreader and how it helps me make sure everything is going as planned in my classes with the students commenting on each other’s blogs, which they did this weekend.

Here’s how it works: For each student’s blog, I subscribe to their blog post feed AND to their blog comment feed (that is one of my requirements: they can use any blog platform they want so long as it is ad-free and has separate full feeds for posts and for comments). That means I end up with a folder in Inoreader that contains all the comment feeds, and I name each feed for each person whose blog the feed comes from, with a two letter prefix for the class.

Then, after the first round of comments (which is sometimes kind of chaotic because of add/drop), I can quickly click through the subscriptions in that folder to make sure everybody has at least two comments, and hopefully four. Some people might have even more than that if I have also left some comments (which I do when I have time). Here’s a screenshot that shows how the interface looks. This student in Myth-Folklore (MF) has gotten five comments, so that’s good! (I could read the comments too if I wanted, but I’m honestly just checking for numbers of comments today.)

So, it takes literally just a couple of minutes to click on through all the students (I have anywhere from 80 to 90 in any given semester, both classes combined), making sure that despite the chaos of add/drop, things look good.

I rely on the power of random for the blog comments, and as the semester goes along, students will sometimes have four comments each week, sometimes just two, and possibly none (it’s rare, but it happens), and at the same time, they also understand why it’s unpredictable. Some weeks they themselves might skip the blog commenting assignment, and so it’s a kind of lesson in comment karma. Overall, the goal is for everyone to do the commenting assignment every week and for every person to get four comments… and on average, that is mostly how it works out, with a little fluctuation from week to week. When I set up the blog comment groups for Week 2 later this week, I’ll write up a post here to explain exactly how that works; the power of random minimizes the time I spend in creating the groups, while maximizing the spread of comments throughout the class as a whole.

Meanwhile, though, I am really glad that Inoreader makes it easy for me to check on the comments during Week 1. It’s important that everybody feel included in the class during the first week, and both giving and getting comments is part of how that works. And it worked pretty well this week I think!

How is this relevant to Canvas? It’s relevant because there is nothing in Canvas that helps to check on levels of engagement in a class like this. Blogs, by having a person-based stream which in turn collects comments, lends itself to this type of inspection. Especially because I teach fully online classes, I need to be able to see that things are going well, checking on each and every student as the semester gets started, just to make sure! That’s why I am glad I have Inoreader; it works for me. 🙂

Connecting with others: it’s important both for life and for learning.

Connect with others to reduce stress.


Crossposted at OU Canvas Community.

Friday Thoughts re: Online Presence

This week’s posts were originally going to be all about the blog networks in my classes (the students’ blogs, my blogs), but it ended up getting mixed in with a couple of posts about the online Canvas training in which I participated this week. For this final post of the week (Happy Friday!), I want to write a post that follows up on both of those themes: ONLINE PRESENCE. Specifically, the way that blogs build online presence, and the way that Canvas does not.

Online Presence: Instructors. As an online instructor, I consider “online presence” to be the most important factor in my course design. What can I do to be “present” to my students? That’s actually pretty easy, for me anyway; I see other faculty struggle with this. I’ll have more to say about that below. But even more important is…

Online Presence: Students. This is the biggest challenge I face as an online instructor: how can I encourage students to be “present” both to me and to each other? Students don’t really expect to be “present” in an online class; there’s not really an online equivalent to classroom attendance. To be present in a classroom-based class means to show up. You put your butt in the seat. You answer “Present!” if the teacher calls roll. But that mere physical presence doesn’t rank really highly in my experience: if students are present but not participating, I’m not impressed. Presence needs to be more than just butt in seat (or eyes on screen), more than just taking notes (or mouse clicks).

The notion of “online presence” is a big one, something that you can explore in many ways. And it is something very important to explore. In this post, I’ll describe some of the ways I think about online presence in my classes. In fact, it is such a huge topic that I think I will resort to just listing the first 10 thoughts that come to mind, knowing that I will return to this topic again later. So, in no particular order, here are 10 things that come to mind when I think about online presence in online courses:

1. Blogs provide a personal space AND a personal stream. Blogs are a space in the sense that you build a blog like a website, but it’s better than a website because the blog is also a place where people can come visit you and leave comments (person to person) and it is also your personal stream which can then be combined into larger streams for the class as a whole (see my post on Inoreader for assignment streams).

2. Canvas has no personal space and no personal stream. There is a Canvas profile page but it is very static: you just put in a little bio and a list of links. The profile page does not reflect your activity in the Canvas network; see my online convo with Jared Stein at Instructure about the lack of personal streams in Canvas. It would not be rocket science to make the profile page into a dynamic personal stream: Canvas has all the data it needs to do that. The problem is not a lack of data; it is a failure of design. A failure of culture. A failure to be present.

3. You can be yourself at your blog. As students work on their blogs over the semester, it builds their presence through the contents of their posts and also through the way they work on the blog design: the look-and-feel of the blog overall and also the contents of the sidebar. They are making choices, they are getting ideas from one another, they are learning about technology. It’s a great process, and it is one that unfolds easily step by step over the course of the semester. There are always new things to explore and experiment with in the digital world. Words, images, media, design. Personal. Creative. Fun. (I need to make sure to come back around to fun before this post is over!)

4. You cannot be yourself in your Canvas profile. I am more than a picture, a paragraph, and some links. But that is all you can be with a Canvas profile.

5. People don’t even fill out their Canvas profile. Even though I think the Canvas profile page is totally boring, I took a few minutes to fill it out; since it is so primitive/limited, it only takes a few minutes to complete. Yet in the online Canvas training I had this week, there was no reminder to fill out the profile, and the trainer had not filled out her profile.

6. An Introduction post in a discussion board does NOT help to build online presence. What is up with the cult of discussion board introductions? In the Canvas training, we were not told to fill out our profiles in Canvas (which is at least potentially useful over time), but of course we were told to write a “self-introduction” post at the Discussion Board… yet those Discussion Board Introductions were not important at all as things turned out. I commented on a few of them to try to create some kind of conversational atmosphere, but the trainer did not reply to any of the Introduction posts, and we were not encouraged to read and reply to each other. Time and effort are precious commodities, both online and in real life. Writing those Introduction posts was not the best use of our time and effort.

7. Introduction blog posts can be in continuous use. In contrast to the perfunctory discussion board Introduction posts, it’s possible to make really good use of Introduction posts at a blog, but you need to design the class with that in mind. In my classes, students do an Introduction post in their blog in the first week of class, and they use the “Introduction” label on that post. It’s the only post that will have that label, and by having a label, the post then shows up automatically in their sidebar navigation. I make sure to explain to them how labels work as a navigation system for the blog overall; it’s part of the Introduction post assignment! Then, at the end of the first week, I put students in random groups where they read each other’s first week posts, including the Introduction post. But here’s the key thing: they are in random blog groups like that each week, and when they meet a new person in their blog group (which is almost every week), they read that person’s Introduction and leave a comment. So, as a result, they are reading and commenting on Introductions all semester long, and the Introduction post is always the one with the most comments because it is in continuous reuse.

8. Introduction blog posts can evolve. As the semester goes on, students can expand on their Introduction posts. They might want to add “new news” about themselves (accomplishments, big events), and they might also expand on their technical skills, like if they learn how to embed video or audio media into a blog post and want to go back and add that to their Introduction. Some students keep on tinkering with their Introduction, some don’t — and it’s all good! The continuous activity in the comment section for the Introduction post is both a way to connect with other students in the class along with a reminder about the existence of the Introduction post, an open invitation to tinker with the post some more as the semester progresses.

9. Discussion board posts do not evolve. The problem mentioned above with the perfunctory Introduction discussion board posts applies to the use of discussion board posts in general. Although there are some creative ways that people can use discussion boards, the actual technology involved works again the reuse of discussion board posts compared to blog posts. Discussion board posts are hard or impossible to link to (blog posts and even blog comments are linkable), discussion board posts are hard or impossible to find (compare the automatic navigation provided by blog labels), and discussion board posts do not contribute to evolving personal streams (see comment above about the gap between the Canvas profile page and user activity in a course). In short: blogs can build personal presence in so many ways, but discussion boards do not. Insofar as discussion boards are the locus of inter-action in an online course, that course design is not actively helping to build each person’s online presence in a lasting way.

10. Online presence can … and should be … FUN. Spontaneous. Unpredictable. Dynamic. Stimulating. Pleasurable. But Canvas is just not fun. Aside from the panda, is there anything fun about Canvas? The design imperative of Canvas is clearly to make things look all the same, to have everything (and everyone) behave in the same way, and to standardize everything. Which also means: to take the fun out of it. For more about Canvas and cognitive underloading, see the sharp and insightful commentaries by Lisa Lane at her blog; here are just some of her posts:
The LMS and the End of Information Literacy
The Pedagogy of Canvas
Complexity over simplicity in online classes
(and you can read my thoughts about all that here: Engagement, Creativity, and Non-Conformity)

Okay, I have reached the magic number of 10, and I have work to do today, so I’ll stop here. That was admittedly a hodge-podge of thoughts, but it gives me something to return and build on the next time that I address the question of online presence. Blogging: it iterates! 🙂

It takes time for potential to flower.

Crossposted at OU Canvas Community.

The LMS and Its Dis-Contents

So, I’m following up on yesterday’s post re: connected blogs as a content management system, as opposed to putting content into the LMS with its semester-based course-defined approach. For me, blogs are better in every way, and I’ve actually never put content into an LMS; before I switched to blogging platforms exclusively around 2005, I created freestanding websites with tools like Composer and Dreamweaver. There are a lot of factors involved, and I’ll sort them into two categories:

  • the advantages of publishing on the open Internet and using real publishing tools
  • the disadvantages of publishing inside an LMS and using the LMS tools.

I’ll try to limit myself to just 10 factors (5 for each category), and then maybe somebody who has had success with content inside the LMS can share their experiences. I’m sure that content inside the LMS can work well in some situations, but I honestly don’t know what those situations would be. What I do know is that publishing content on the Internet with real tools has worked great for me, and here are the main reasons why… and I hope I’ve zoomed in on the most important reasons here, but I’m giving myself the option to add to the list later if I realize I left something important out! 🙂

Advantages of publishing on the open Internet and using real publishing tools:

1. Fast, fast, fast, fast, fast. Did I say fast? The whole reason I have opted for blogs over websites is that blogs optimize my time for content creation. I rely on labels and other blogging tricks to manage the navigation, and I am happy with simple templates for the design. That means I can focus on content creation. And I have so much content I want to create and share! If you look at the list of blogs for my classes, you will see what I have created lots of content. Beyond those blogs, I have many other blogs for my writing and research that are full of yet more content. The thought of trying to create all that content inside an LMS makes me shudder.

2. Fun. It may sound silly, but the fun factor matters a lot to me. If I am going to spend serious time creating content (and I do), I want to be able to have fun doing that, creating fun widgets to use in my blog sidebars and playing around with the template design. Nothing fancy, but being able to just play around with it. There is nothing (NOTHING) fun or playful about creating content inside the Canvas LMS. At least D2L kind of sort of tried to provide some fun design templates. In Canvas, the goal is clearly to stop anyone from having fun because everything is supposed to look exactly the same in every course everywhere all the time.

3. Project-Based. As you can see from my list of content blogs, they are project based. Some are old projects, some are new projects; some are retired projects, some are ongoing projects, and some are projects that I’m thinking about reviving. A few of the blogs are specific to a course, but the majority of blogs are actually not course-specific. I need to be able to develop content based on specific project goals, and it would be very limiting if I were to think of my content in course-based terms.

4. Co-Learning with my Students. As I mentioned in previous posts, my students are blogging too, so we are learning about blogging together. Canvas is not a tool I can co-learn with my students. I far prefer to use the same tools as my students so that we can do that together. I learn more, they learn more. We all learn more. Connecting learning: it works.

5. Real Tools for the Real World. This is closely related to the previous reason I gave about using the same tools with my students, but with a forward-looking / outward-looking emphasis. If my students and I are using real tools as we work and learn online, it’s more likely that we will able to use those same tools for other tasks, both now and in the future. The LMS is a faux tool that does not have a lot of transference. Blogs have great transference, as do the other digital tools that I encourage my students to use as they create content for this class. Their blogging and content creation skills are something they could put on their resume; their use of the Canvas Discussion Board is not.

Disadvantages of publishing inside an LMS and using the LMS tools.

6. Lack of Course Continuity. Instead of seeing a course that persists over time with new cohorts of students (which would make sense), the LMS treats every new semester instance as starting from scratch: new students and new content. So, each semester you “copy” content from the old semester to the new semester, but that’s a bad way to do business — and it’s a TERRIBLE way to do business if you want to make your courses public, as I do. If you make your courses public to share with other teachers and learners, you want the links to continue to be valid, and you want the links to lead to the current version of the content. That kind of content continuity is impossible when the LMS treats every semester as starting from scratch. How did we end up with this deplorable mess? It happened because the LMS was built, first and foremost, to meet the administrative needs of enrollment and grading, not for the purpose of developing online content.

7. Terrible Content Creation Tools. I’ve now created a fair number of pages at Canvas for my Canvas Widget Warehouse and my Growth Mindset Playground, and it is a very frustrating experience. Probably the biggest frustration for me is how little of the screen space I control. Looking at a 1200×800 display, I have 900×500 of real estate that I can edit, which is less than half of the available space.

8. Terrible Content Navigation. Or, rather, there is no navigation. I have to build the Pages navigation menus manually, which is a nightmare. If I want to try to use the left-hand navigation bar, my only recourse is to keep adding instances of the Redirect LTI, as opposed to just editing the navigation directly. If I want to, god forbid, put an external site in the sidebar navigation, students are warned of the danger of leaving Canvas, even though I am the one who put the link in the navigation bar for them! The idea, of course, is that I am supposed to do all the navigation through the Modules, arranging everything in linear order. But there is nothing linear about my pedagogy, and nothing linear about my content: it’s exploratory, not a one-size-fits-all scripted experience of “previous” and “next.”

9. Terrible Content Maintenance Tools. Or, rather, the LMS content maintenance tools are non-existent. In Pages, I cannot put my pages into folder or tag them in order to help me manage my workflow. Why are there folder options in the Files section, but not in the Pages? I can sort Pages by creation date and last edit, but that’s it. There are no other tools available for me to use in managing the content. Not even a search box. Eeek.

10. Uncertain Longevity. My school stayed with D2L for many years, and based on that, I can imagine we will stay for many years with Canvas LMS. But that’s not something that I control; Canvas could go away next year or the year after. As someone who is in this for the long term (I’ve been developing online course materials since back in 1998), that worries me. I’m not a proponent of “it must all be on my own domain,” but I am a proponent of being able to make my own decisions about the platforms that I use, and longevity is important to me. When it comes to my school’s commitment to an LMS, I can hope for longevity, but it is just that: a hope. They could change LMSes any time, a decision completely beyond my control and even beyond my influence.

So, as part of driving my own learning, I need to be able to drive my own content… and the LMS just does not give me a way to do that. For me, blogging is by far the better option.

I drive my own learning.

Crossposted at OU Canvas Community.

A Blog Network for Class Content

Yesterday I wrote about how I use Inoreader to collect all my student blog posts so that I can read them, and also how I use Inoreader to organize those posts into content streams that I can then share with my class. My students’ blogs form a network that IS our class: all that they are reading and writing and learning travels through that network, reaching me and reaching the other students in the class. Connected learning. I cannot imagine teaching any other way.

What I want to write about today is a different blog network: the interconnected set of blogs that provide the content for my classes. I do have a class wiki, but it just contains the class calendar and assignment instructions: Online Course Lady Wiki. All the actual class content comes through my various blogs.

Why blogs? I use blogs for my content because they are the fastest, easiest, most flexible, and most organized type of web publishing that I have found. YMMV. Today I will list the different blogs I use to support my classes, and then in tomorrow’s post I’ll describe the advantages of using blogs for content as opposed to (ugh) using the LMS.

Daily Class Announcements. This is the blog that I use as the homepage for my Canvas courses; it features new content every day during the semester, but I do not use it when school is not in session.
Total posts: 1839.

Writing Laboratory. This is a writing support site with all my help pages for English punctuation and other writing mechanics. Plus, I add new humor and motivational materials during the semester. This blog houses the content for my Writing Inspiration and my Writing Humor widgets.
Total posts: 537.

Growth Mindset Cats. I added new content to his blog regularly for three semesters; now I add new content periodically, and I also recycle old posts to bring them back to the front page of the blog. This blog also houses the contents for my Growth Mindset Cats widget.
Total posts: 426.

Learning by H.E.A.R.T. This is a newish blog, a companion to the Growth Mindset blog, and I am actively developing it this semester; I’ll be adding new content several times each week as the semester gets underway. I also have a H.E.A.R.T. widget using contents from this blog.
Total posts: 178.

E-Storybook Central. This is a blog which used to house a lot of content, but it has been mostly spun off to the Freebookapalooza blog. With the coming demise of the old Google Sites, though, I will be repurposing this blog to archive past student projects in a kind of online catalog before the old Google Sites is shuttered in 2018. Right now, the main purpose of this blog is to provide a list of past student Storybook projects in both of my classes, along with the Storybook widgets.
Total posts: 68.

Freebookapalooza. This blog was a summer project from 2016; I managed to add about 900 books that summer. I hope to spend a good chunk of next summer adding more materials. I have created a variety of Freebookapalooza widgets using the contents of this blog.
Total posts: 937.

Myth-Folklore UnTextbook. This blog was a summer project from 2014; it contains the 100 reading units that students choose from in the Myth-Folklore class. I also add new content periodically that I think would be of interest to students in that class.  Most of the stories in the reading units have illustrations, and so I have a Myth-Folklore Images widget that uses those illustrations.
Total posts: 2572.

Indian Epics Images. I regularly add new content to this blog, based on artwork that people share at Twitter or that I find at museum websites. This blog is also the home of my Public Domain Editions of the Ramayana and the Mahabharata (a project from Summer 2015), which students use in for reading in the Indian Epics class. I reuse the images from this blog in my Indian Epic Images widget.
Total posts: 1142.

Indian Epics Reading Guides. This blog houses reading guides for the additional reading materials that I use in the Indian Epics class, along with other content that I think would be of interest to students in that class.
Total posts: 371.

Indian Epics Comic Books. This blog was a summer project from 2015; it contains pages for the 100+ comic books that students use as reading options in the Indian Epics class. I don’t add new posts here, but when I have time I add more detailed reading guides to the comic books that are most popular with the students.
Total posts: 151.

Proverb Laboratory: Posters. This blog was a summer project from 2013; I don’t add new Posters, but I recycle the old posters by using them in the daily class announcements. The new content at this blog consists of Latin LOLCats (a hobby, not for a class that I teach since my school, alas, will not let me teach Latin). Using the contents of this blog I’ve made a Proverb Posters widget and also a Latin LOLCats widget.
Total posts: 1665.

What I like best about blogs: they start small, and then they grow!

Big oaks from little acorns grow.

Crossposted at OU Canvas Community.

css.php