Canvas-Friendly Javascripts

Here’s the Canvas-Friendly Javascripts Slidedeck for the CanvasLIVE presentation with the video of the session and notes on the slides below:

This is the video:

Slide 1. Welcome.

Slide 2. Title slide.

Slide 3. Connected Learning… with Cats.
You can see all the Connected Learning with Cats events here.

Slide 4. Connected Learning and Chance Encounters.
The theme I want to emphasize here is content serendipity, as opposed to content mastery. Especially in Gen. Ed. Humanities courses, like the ones I teach, mastery and coverage are not really the goals. Instead, for me, the goal is to get each student connected to something in the realm of reading and writing that they really care about, something that excites them, something that inspires them. That might be different for each student, and it might require sifting through massive quantities of content. By using the power of daily content and random content, you can expose students to a lot of content, and maximize the chances that something will click.

Slide 5. Javascript Randomizers.
I use javascript randomizers in all my class blogs (especially the sidebars) and at my class wiki. It means students see new content each time they return to a page, and the randomness is fun and unpredictable. Most importantly, randomness is a way to surface lots of content. If you have lots of links or images you want to share with students, displaying them all at once is not effective, but displaying something at random means that, over time, students will see all the content, a little bit at a time.

Slide 6. The Fates Say…
The first javascript I ever used was a little randomizer that I wrote myself by hand way back in 2002. This was the first semester I taught online, and my students were choosing between two units to read each week. I offered them a link that say “Let the Fates decide…” and then a message popped up at random with “The Fates say…” (and then a 50-50 chance of one unit or the other). Students loved it! They sometimes would write in their blog, “I chose Ovid because the Fates said Ovid three times in a row.”

Slide 7. Creating Your Own Javascripts.
Because of the success of that randomizer, I knew I wanted to use lots of randomizers, but I did not know any programming and did not have time to learn. So, I hired a genius student, Randy Hoyt, to build a tool for me that would take the content I supplied and turn it into a javascript, either date-based (“___ of the Day” for example) or at random. He created that tool back in 2003, and he is still hosting it online for free at his website: RotateContent.com. Thank you, Randy! (And in addition to being a genius programmer, he also designs board games: Foxtrot Games.) You can show Randy some love at Twitter.

Slide 8. Javascripts and Canvas. 
Using javascripts in blogs and webpages is easy, but Canvas does not let you just paste a javascript into a Page. There is a workaround, though: you just need to create an HTML page in an https webspace which contains the javascript, and then you can use an iframe to display the HTML page in a Canvas Page, in the Syllabus, in a Discussion Board, etc. etc. This technique works for Rotate Content scripts and also for Twitter javascripts widgets; see my Twitter4Canvas Workshop for details. You can also do this with javascript widgets from Flickr and from Pinterest.

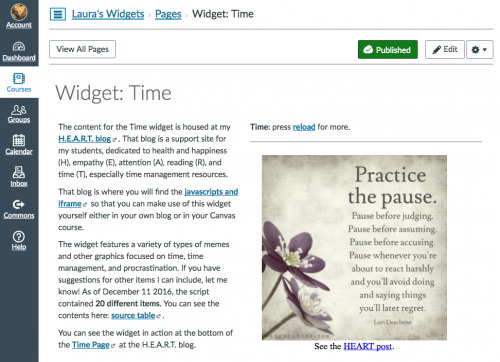
Slide 9. Laura’s Widget Warehouse.
But don’t let all of that scare you: I’ve already created some ready-to-use Canvas widgets where you can just copy-and-paste the iframe from my Canvas space into yours. They are all in the Widget Warehouse, and you can also just browse the raw content and use that too if you want.

Slide 10. Agenda for this Presentation.
So, I’ll be covering those three topics in more detail: in Part 1 I’ll discuss the different types of javascripts you can create with Rotate Content, then in Part 2 I’ll show some of the ready-to-use Canvas scripts in my Widget Warehouse, and finally in Part 3 I’ll walk through the steps you can follow to create your own scripts with Rotate Content and use them in Canvas.

Slide 11. Part 1: Rotate Content Scripts.
The Rotate Content tool takes an HTML table that you prepare and converts it to a javascript. I’ll discuss the types of content that you can put into the table and then the types of scripts that it will generate.

Slide 12. Types of HTML Content.
You can basically put ANY kind of HTML content in the table. That can be simple text and links (example), images (example), embedded video (example), or even other scripts (example: this page calls a script at random from among all the scripts in the Warehouse). The key thing to remember is that everything must be https, and that includes images you might be using.

Slide 13. Rotate Perpetual Date.
In addition to displaying a range of content, you can configure the script in different ways. There are two kinds of date-based scripts: perpetual and specific. You use a perpetual calendar to create content that will recur year to year based solely on the date. For example, the Latin LOLCat Calendar has 366 items (Leap Year!), with a new cat for each date.

Slide 14. Rotate Specific Date.
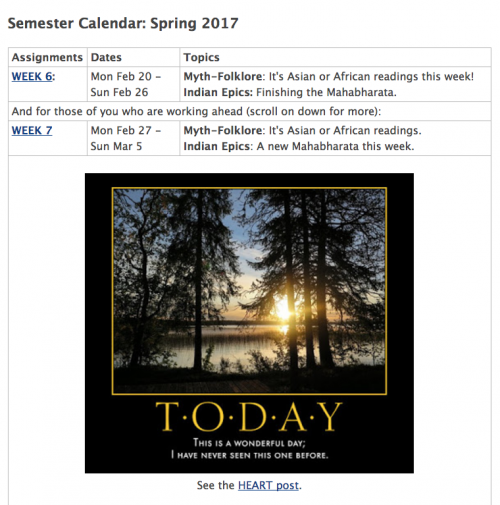
You can also create content that you use for a specific range of dates in a specific year. That is how my semester countdown widget works; I change the dates for this one every semester.

Slide 15. Rotate Random.
This is what I use most often: the totally random javascript. In this HTML table, there is no date column; just the word “random” in the cell for each row. You can make randomizers with just two items or with hundreds of items. My Freebookapalooza widget has hundreds of items for example.

Slide 16. Rotate Date-Based AND Random.
Randy also built in a very nice feature so that if you do have a date-based widget, you can use that same content randomly. To do that, you just change a variable in the script call; the script itself is the same. You can compare the two different ways of displaying the Elizabethan Proverbs widget here: date-based and random.

Slide 17. Part 2: Laura’s Widget Warehouse.
Each page in the Widget Warehouse contains a link where you can find the script and the iframe version you need in Canvas, along with a link to the raw HTML table so that you can browse and re-use the source material directly if you want.
Slide 18. Random Motivation.
Slide 19. Random Humor.
Slide 20. Random Resources.
Slide 21. Random Art Images.
Slide 22. Random Student Work.

Slide 23. Part 3: Creating Your Own Scripts.
To create your own scripts you need to feel comfortable editing HTML, either with an HTML editor or editing by hand (I usually create my tables using a Google Sheet; it’s faster than editing a table). You also need your own https space. I am very lucky that my school has a Domain of One’s Own project with Reclaim Hosting, and I cannot say enough good things about the people at Reclaim. Even if your school does not offer web hosting, you can get excellent individual hosting. They really know how to work with and support educators!

Slide 24. 6-Step Canvas Widgets.
This is just a quick overview of the process of creating javascripts using the Rotate Content tool. You will find detailed instructions at the Rotate Content site for Steps 1-2-3-4. The two additional steps are required to get the javascript to work in Canvas. Please feel free to contact me with any questions you have about this, and based on people’s feedback I can create some more specific tutorials if you want.
Slide 25. Generate HTML table.
Slide 26. Enter content in table.
Slide 27. Convert table to script.
Slide 28. Publish the javascript.
Slide 29. Create and publish HTML script page.
Slide 30. Use iframe in Canvas.

Slide 31. Presentation Recap.
Please go browse the Widget Warehouse and see what you think. Maybe you will find some scripts there you want to use, or even just some content that is useful to you. And if you get some ideas for scripts of your own, you can use Rotate Content to create your own scripts. Maybe you will want to build a Widget Warehouse of your own to share your scripts with others too!

Slide 32. Let’s connect! Please feel free to contact me with any questions, ideas, or suggestions. 🙂

Growth Mindset CanvasLIVE

Here’s the Growth Mindset Slidedeck for the CanvasLIVE presentation, with notes and links below, and I’ve also embedded the YouTube video of the event. 🙂

Here are the slides with notes:

Slide 1. Welcome Slide.

Slide 2. Title Slide.

Slide 3. Connected Learning… with Cats.
You can find the complete series here at this blog: Connected Learning with Cats. I’ve got four more events scheduled after this one: Javascripts, YouTube Playlists, Free Online Books, and Pinterest/Flickr. Let me know what other topics would be of interest!

Slide 4. Five Key Mindset Concepts.
In Part A of the presentation, I’ll describe my approach to the growth mindset concept with these five key ideas.

Slide 5. Carol Dweck: Mindset.
I recommend Carol Dweck’s book Mindset very highly, and you can also find some excellent Carol Dweck videos along with articles and interviews online. She is extremely good at speaking to a wide range of audiences: teachers, parents, and learners of all kinds.

Slide 6. Five Design Strategies.
In Part B, I’ll explain how I use growth mindset ideas when I design my courses.

Slide 7. Five Tools at the Website.
In the final part of the presentation, I’ll provide an overview of some helpful tools I am using to build a new open Canvas course resource: Exploring Growth Mindset which has this simple URL: Mindset.LauraGibbs.net.

PART A: FIVE KEY MINDSET CONCEPTS

Slide 8. Five Key Mindset Concepts.
I approach the growth mindset concept from different angles: Aim High — Explore — Work Hard — Improve — Enjoy. You might decide to break down the mindset concept differently for your students; this is what I have found works best for me!

Slide 9. 1. Aim High.
This area involves setting realistic personal goals, along with being willing to take risks to achieve those goals, and persevering. One thing I find really helpful is to get students focused on moving forward; don’t try to retrace your steps, but just keep on looking ahead to figure out what to do next! There are articles and more resources here.

Slide 10. 2. Explore.
This is probably my personal favorite among the growth mindset domains: curiosity and creativity. This is also where I locate research on neuroplasticity and the fact that as you learn, you are literally growing new connections in your brain. Given that many of my students are future medical professionals, this is definitely something I like to emphasize in the growth mindset approach. There are articles and more resources here.

Slide 11. 3. Work.
Side by side with open-ended exploration is the need to stay focused, work hard, and be patient as you put in all the practice that is required to learn new skills. I teach writing, so practice is a huge part of that process, and patience is definitely required! LOTS of patience. There are articles and more resources here.

Slide 12. 4. Improve.
As a teacher, there is where I put in the most effort: students need detailed, helpful, timely feedback in order to learn from their mistakes. I also urge the students to do a lot of self-reflection and to see themselves as learners beyond the scope of the course: my biggest goal is to help them become self-determined learners for life! There are articles and more resources here.

Slide 13. 5. Enjoy.
By fun and enjoyment, I have in mind the joy of learning itself, along with connecting and sharing with others. Plus, it’s important to take care of yourself: learning is hard work, so you need to make sure you take time to relax. You can’t afford to neglect health or happiness if you want to succeed over the long run! There are articles and more resources here.

PART B: FIVE DESIGN STRATEGIES.

Slide 14. Five Design Strategies.
These are strategies that work in my classes, and I am guessing they can be generalized to other classes as well: Teach about Mindset — Reinforce Daily — Create Challenges — Focus on Feedback — Be a Co-Learner.

Slide 15. 1. Teach about Mindset.
I start the semester with a growth mindset activity in the first week of class: Week 1 Growth MindsetThis TED talk by Carol Dweck is one good way to get started, and my students then share their thoughts and reactions in a blog post (my students all have their own blogs), although of course a discussion board could work also. Students usually have a lot to say on this topic!

Slide 16. 2. Reinforce Daily.
I use Growth Mindset Cats every day in my class announcements, and you can find out more about the daily announcements: CanvasLIVE on Blog-as Homepage. There are Growth Mindset Cats both in the body of the announcements and in the sidebar, along with random student quotes from their blog posts in the sidebar as well.

Slide 17. 3. Create Challenges.
Students can complete weekly growth mindset challenges of their choice; developing new kinds of challenges is one of my goals for this summer. In addition, as students work on their writing, I pose that process in the form of  writing challenges. For those of you who teach writing, I have found this to be really successful: it helps students remember that learning how to write is a long-term growth process, and it also encourages them to set goals for themselves as part of that long-term process.

Slide 18. 4. Focus on Feedback.
I am constantly trying to improve my own feedback practices, while helping students understand both giving and receiving feedback. This is where I spend the largest chunk of my time as a teacher, and I try really hard to couch my feedback to the students in terms of growth mindset concepts.

Slide 19. #TTOG Teachers Throwing Out Grades.
I also have to say something here about the need to stop punitive grading if we want students to trust us that learning from mistakes is really okay. If it’s really okay, we have to stop penalizing for mistakes and instead focus on recognition of learning progress. You can read about how I’ve tried to do that in my classes here: all-feedback-no-grades.

Slide 20. 5. Be a Co-Learner.
Probably the thing I like best about growth mindset is that I am constantly working on my mindset, side by side with my students. We are COLEARNERS. Admittedly, our goals are different (I’m trying to learn how to become a better teacher; they are learning how to become better writers)… but growth mindset allows us to see those different goals as part of a shared growth process.

PART A: FIVE CANVAS-FRIENDLY TOOLS.

Slide 21. Five Canvas-Friendly Tools.
I’ll finish up with a quick overview of my new Canvas course resource site: Exploring Growth Mindset. My goal is for this site to have a continuous stream of new content automatically. I am not going to have time to update it when the school year begins, so I need it to update based on my normal web activities which is based on using these tools.

Slide 22. 1. Flickr & Pinterest.
As I create new mindset cats, I add them to my albums at Flickr and at PinterestBoth of these tools are easy to embed inside a Canvas course, and I’ll be doing a CanvasLIVE presentation later this summer about using Flickr and Pinterest in Canvas: Beautiful Curation: Pinterest and Flickr in Canvas.

Slide 23. 2. Diigo Bookmarks.
As I find new resources, I bookmark them with Diigo, and they then appear automatically in Canvas. My current focus is transcribing infographics. To get the Diigo bookmarks to appear in Canvas, I use an RSS tool called Inoreader; if that is something you are interested in, get in touch with me, and I will be glad to share details about how that works.

Slide 24. 3. Twitter.
I have a dedicated Twitter account, @MindsetPlay, that I use just for growth mindset and related materials. You can see the live feed inside the Canvas course, and I did a CanvasLIVE that explains how to use real Twitter widgets this way inside a Canvas course: Twitter4Canvas CanvasLIVE.

Slide 25. 4. YouTube.
I have a YouTube playlist of growth mindset videos. Please send me suggestions of videos you find useful in teaching about growth mindset with your students! There’s a Feedback form at the site you can use for that. Also, I have a CanvasLIVE about YouTube Playlists coming up this summer: Amplify YouTube with Playlists.

Slide 26. 5. Padlet.
I am really excited about using Padlet to collect and share thoughts from my students about their growth mindset experiences. I find their ideas to be really inspiring! You can read more in my Canvas Community blog about Padlet and my Padlet Randomizer. I’ll be doing a CanvasLIVE on javascript randomizers like this: Laura’s Widget Warehouse: Canvas-Friendly Javascripts.

Slide 27. A recap….

Slide 28. Five Key Mindset Concepts.

Slide 29. Five Design Strategies.

Slide 30. Five Canvas-Friendly Tools

Slide 31. Let’s connect!
And I’m glad to discuss and brainstorm about any and all of those things! You can reach me at Twitter: @OnlineCrsLady and at the Canvas Community where I’m now blogging regularly.

Slide 32. Get Involved…


The Power of Randomizers… Everywhere

One of my favorite motivational posters happened to pop up today when I checked something on my class calendar, and that prompted me to write up a post here about how I integrated a randomizer into the class calendar page last year… and now I cannot imagine doing the calendar without that. Here’s a screenshot, and below I explain how it works:

So, the Class Calendar is a page at my wiki, but of course the same approach could work as a Canvas Page. There’s nothing fancy as you can see: I have a table with three columns: the week, the start-stop dates, and a link to the week’s assignments (I have two links since I use the same calendar page for both of my classes).

Go ahead and take a look: Class Calendar. As you can see, I list the current week at the very top, with all the future weeks below, and then at the bottom you’ll also find the completed weeks. On Monday, I just move the top row of the table down to the bottom.

The randomizer comes between the top two rows and the rest of the table. The top two rows because I strongly encourage my students to work ahead, so in any given week, students are either working on the current week or the coming week. A few students are even more ahead than that, but only a few, so they can just scroll down below the graphic to get to their active week.

So, the randomizer: each time you come to the Calendar, an item pops up at random, and each item has a link where students can learn more about the item if it really grabs their attention. That is always my great hope: please be curious! please click! please go go go and learn more on the Internet following your curiosity!

But even without click-and-go, the graphic conveys something that I hope will be of value to the student. Try it yourself; you will probably see something new each time the page reloads. There are 20 items, so it’s not a lot, but enough to provide a decently random experience.

That particular randomizer shows time-related items, which I thought would be appropriate for a calendar page! Here is more information about it: Time Randomizer Widget.

That widget is just one of many at my Widget Warehouse, which I built to keep track of my own widgets but also to share with others. You can grab the javascript to use in your own blog or website or wiki. You can grab the https-iframe version to use in a Canvas Page. You can grab the raw source table to adapt for your own purposes. Or you can just build your own widget with the wonderful free tool from Randy Hoyt: RotateContent.com (I am proud to say he is a former student… and genius designer of board games also!).

I need to try to write more in this blog about my use of randomizers, but this can be a start anyway. And here again is the motivational poster that prompted me to write this post. Have a wonderful day! 🙂

This is a wonderful day;
I have never seen this one before.
(H.E.A.R.T. blog)

Crossposted at Canvas Community.

css.php