Welcome to the fourth Blog Index post of 2017! This weekend I really focused on finishing up the tutorials at the Twitter4Canvas project, and I am really happy about how that is going. I will have to write up a post about that tomorrow. 🙂
This week’s posts are in bold up towards the top of the index:
Twitter4Canvas Mini-Course
- Twitter for Class Content: My Top 5 Strategies. This is a summary of how/why I use Twitter for my classes.
- Twitter4Canvas: Good things come in fives. This is my rough sketch for a 5-step workshop approach for Twitter widgets in Canvas via OU Create.
- Twitter4Canvas: Getting Started. I’ve decided to launch a new Canvas project: a mini-course in using Twitter in Canvas.
- Twitter4Canvas: I’m excited about this! More thoughts on how this mini-course will take shape.
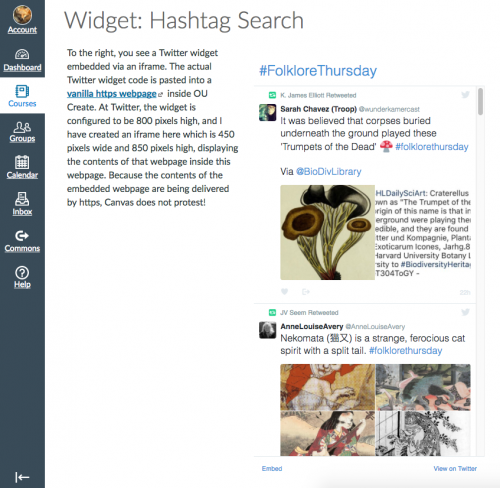
- Twitter4Canvas v. Canvas Twitter App. A comparison of a real Twitter widget and the (seriously limited) Canvas Twitter App.
- Twitter in Canvas and the Occasional Hashtag. This is the post that prompted me to come up with the mini-course.
Canvas Class Announcements
- Blissfully Blogging Announcements in Canvas. A description of my class announcements blog plus details about embedding blogs in Canvas.
- The Power of Random Cats. I used random cats to promote growth mindset in my Canvas announcements blog.
- New Countdown Widget on Homepage. I created a new “__ days left in the semester” widget for my Canvas announcements blog.
- Maati Baani in my Canvas Homepage. I like to share videos with students via my Canvas announcements blog… and Maati Baani is great for my India class.
Blogs and Blogging
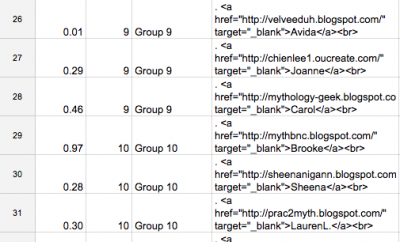
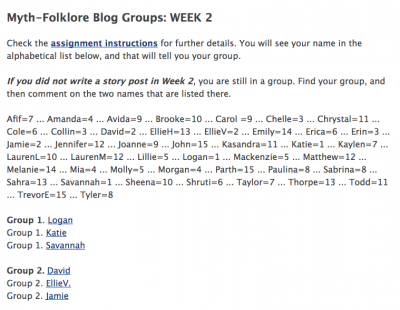
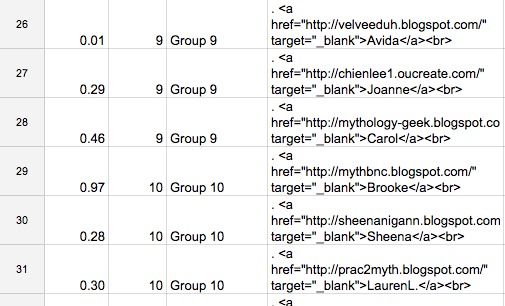
- Keep Calm and Love the Randomness. This is how I create random responding groups for my classes each week.
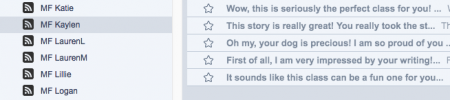
- Inoreader and Tracking Blog Comments. This is how I keep up with my students’ commenting on each other’s blogs.
- Building My Student Blog Network with Inoreader. As students set up their blogs for the new semester, I subscribe to them with the Inoreader feed reader.
- Inoreader: How I Manage Incoming Blog Posts. As students blog, Inoreader automatically sorts, files, and tags the posts based on content.
- A Blog Network for Class Content. This post explains the network of blogs that I use for all the different types of content in my classes.
- Friday Thoughts re: Online Presence. Blogs are great for building online presence; the LMS is not.
- Fall Semester: Blog Success. The Fall semester is over, and having this new blog is one of my semester’s successes.
Thoughts about Canvas and about LMSes
- Introduction for a Canvas Training Course. This is an introduction I wrote for a Canvas training course (closed course), and I crossposted it here.
- The LMS and its Ecosystem. The LMS is just one tool in a technology ecosystem, and it’s good idea to know your ecosystem #BeforeYouLMS.
- The LMS and Its Dis-Contents. Looking at the advantages of publishing on the open Internet and the disadvantages of the LMS.
- How Instructors (Don’t) Use the LMS. These are my thoughts on the Blackboard study showing limited (VERY limited) use of LMS features by instructors.
Spring 2017 Reports
- Friday: Spring Classes Begin … in the Snow. The first day of Spring 2017: I open the classes early for students who want to get a head start.
- Power of API | Power of Community. I was so grateful for James Jones’s API script to globally update all my class assignment dates: wow!
Widgets and Other Dynamic Content
- Martin Luther King Canvas Widget. This is a widget I created in honor of the Martin Luther King Day holiday.
- The Power of a Student Project Archive. A randomizing widget gives my students access to hundreds of past student projects.
- Widgets to Awaken Curiosity. I will be able to use all my new/updated widgets to prompt my students’ curiosity this semester.
- Progress at the Canvas Widget Warehouse. I got a lot done at the Widget Warehouse over winter break!
- Widget Warehouse Update. I’ve added some new widgets, plus a Widget Catalog to keep track of them all.
- New Canvas Course: Laura’s Widget Warehouse. I’ve created a public Canvas course for sharing my Canavs-friendly javascript widgets.
- Become a Javascript Wizard: HTTPS is the key. You can use the power of HTTPS to display javascript content in Canvas.
Openness, Sharing, and Connectedness
- Open: It’s the Canvas Difference. This post in praise of open was prompted by Keegan’s great Camp Canvas and also a video meet-up with the crew at CSU CI.
- Connectedness. This is my grateful response to Jesse Stommel’s blog post about Creative Online Educators.
- Open Content: Resources, not Courses. A warning about the dangers of putting content into LMS course spaces.
- Go Open with Canvas. Canvas, unlike D2L, has some open options, which is my main interest in our switch from D2L to Canvas.
- Canvas for Open Syllabuses. Canvas makes it easy to open up your syllabus so students and other faculty can learn about the class.
Posts about Students
- More Student Voices from Fall 2016. A steady stream of blog posts kept me well informed about student use of Canvas in my classes!
- Student Tech Support for Canvas. Based on student feedback, these are the Canvas features I am supporting and promoting: Calendar, Notifications, Profile, and Mobile App.
- Student Voices about Canvas. These are the results of my Fall 2016 mid-semester student survey, with lots of advice from students for instructors using Canvas.
- Time Management Brainstorms. I got some big ideas from an ILED studio session on helping students with time management.
Posts about Instructors
- Faculty Survey … Faculty Voices. I hope the results of this survey will be shared so that we can learn from each other.
- Big Canvas News for Spring. Instead of being opt-in for Spring, we are going to be opt-out. I hope this blog can be useful for faculty who will start using Canvas.
- Moving from Marketing to Conversation. In addition to student voices about Canvas, we need faculty voices too.
Teaching Writing
- Writing-Enhanced Curriculum Canvas Minicourse. I am really glad that I got to participate in this online learning opportunity, and it would have been even better with more faculty participants. Writing: it’s a topic that can and should be something we all have a lot to say about!
- WEC Minicourse, Day Two. I really appreciated the emphasis on low-stakes, creative approaches in this day of the course.
- Engagement, Creativity, and Non-Conformity. Yes, I believe in creative non-conformity in both teaching and learning.
- Writing yesterday. Writing today. Some thoughts after the presidential election.
Some Practical Canvas Advice
- Use the Canvas “Grace Period.” Having a two-deadline option in Canvas allows me to create a grace period for all assignments (D2L did not).
- Keep Canvas Modules Current. It just takes a minute to keep your module list up-to-date. I make it a weekly routine!
- Use a Course Image. Instead of a (boring) colored block, you can choose to display an image on your Dashboard course card.
- Course Images and Flickr. Not sure what image to use? You can choose your course card image by searching Flickr inside Canvas!
- Think Before You Link: Creating a Canvas URL. To create continuity from semester to semester, you can create a URL for each course you teach.
Grading with Canvas
- The Tyranny of the Percentage: Part 1. In which I learn that I cannot assign letter grades at semester’s end based on my students’ total points.
- The Tyranny of the Percentage: Part 2. In which I research past feature requests related to serious limitations in the Canvas Gradebook.
- The Tyranny of the Percentage: Part 3. In which I vent my frustration with numeric-based grading, the only kind that Canvas supports.
- Feature Request: Text Fields in Gradebook. In which I make a Feature Request, only to learn the Feature Request process has been put on hold.
- Points-Based Grading: Cumulative, Not Punitive. My philosophy of grading is driven by student choice and forward progress.
- Points-Based Grading: Student Gradebook Declarations. Students record their work in the Canvas Gradebook on their own by means of “Declarations.”
- Canvas Hack: Repeated Quiz Content. For recurring Gradebook Declarations each week, I remote-host the content: Canvas meets POSSE.
- Points-Based Grading: Choices, not Zeroes. I am glad that in the Canvas Gradebook a blank really is a blank, not a zero.
And here is one of the growth mindset cats from this week:
Do not go where the path may lead;
go instead where there is no path,
and leave a trail.


